

A material first sneaker cleaning guide using dish soap and baking soda, plus when to machine wash, how to fix yellowed soles with Salon 40, and…
Start with a dry brush, mild dish soap, and warm water applied with a soft brush. That routine safely cleans most canvas, mesh, and rubber sneakers on the market. Leather needs a gentler touch, suede hates water altogether, and yellowed soles require a completely different fix involving baking soda or a stronger oxidizer. Match the method to the material, not the other way around.
TL;DR:
- The best cleaning method is a gentle hand-wash with a soft brush, mild soap, and water, matched carefully to each material’s susceptibility to water damage.
- Use household items like baking soda and hydrogen peroxide for yellowing soles, avoiding strong oxidizers unless professionally managed or deeply stained.
- Machine washing is generally safe only for canvas and synthetic sneakers, with strict parameters like removing laces and insoles, using a mesh bag, and cold cycles; avoid heat drying.
- Prevent damage by avoiding harsh tools like Magic Erasers on leather or suede, never using hot water, and air drying shoes in shaded, ventilated areas.
Table of Contents
- What supplies do you need before you start cleaning sneakers?
- A simple step-by-step routine that works for most sneakers
- Material-by-material instructions: leather, suede, canvas, mesh, and rubber
- When is it safe to machine wash sneakers?
- How do you remove yellowing from sneaker soles?
- Drying, storage, and how often to clean your sneakers
- What tools and cleaners should you actually use?
- Our team’s field-tested tips and troubleshooting
- How do you clean laces and insoles, and when should you replace them?
- How do you clean mud, grass, ink, and oil stains properly?
- What actually gets rid of sneaker odor?
- What eco-friendly cleaning alternatives actually work?
- What common mistakes ruin sneakers during cleaning?
- Our take: the smartest sneaker care skips the extremes
- Sources
What supplies do you need before you start cleaning sneakers?
Grab your gear before you touch a single shoe. Rushing into a cleaning session with the wrong tools is how leather gets scratched and suede gets soaked.
Here’s the core kit worth keeping in a drawer or shoebox specifically for this job:
- A soft-bristled brush (an old toothbrush works for laces and seams)
- Two or three microfiber cloths
- Mild liquid dish soap or a liquid laundry detergent
- A small bowl for mixing soap and warm water
- A dry towel for blotting
Before any deep clean, pull the laces and insoles out. Dry brush the entire shoe first to knock off loose dirt so you’re not grinding grit into the material once it’s wet. Then test whatever cleaner you’re using on a small, hidden patch, like the inside heel or a spot under the tongue. Wait a few minutes and check for discoloration before going further. If your sneakers have painted logos, foil accents, or glued trim, work around them carefully; soap and scrubbing can lift decorative elements that aren’t meant to get wet.
A simple step-by-step routine that works for most sneakers
This hand-wash method covers the bulk of everyday sneakers: canvas high-tops, running shoes, casual synthetics, most rubber-soled kicks.
- Dry brush first. Knock off loose dirt and dried mud with a soft brush before introducing any moisture.
- Mix your solution. Combine a few drops of mild dish soap with warm water in your bowl. This combination is highly effective for cleaning rubber and firm parts of sneakers without stripping finishes or leaving residue.
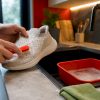
- Scrub in small circles. Dip the soft brush, work it over the upper in gentle circular motions, and focus on stained or scuffed zones.
- Handle the midsole and outsole separately. These parts can take more pressure than the upper. A Magic Eraser works well here, but keep it strictly on rubber; the same abrasiveness that lifts scuffs will dull leather, suede, or knit fabric.
- Wipe away the soap. Use a clean, damp cloth to remove suds, then blot the whole shoe with a dry towel to pull out excess moisture.
- Reshape and air dry. Stuff the toe box with paper or slide in shoe trees to hold the shape, then set the shoes in a shaded, ventilated spot.
Pro Tip: Do one shoe at a time when you’re new to this process. Keep the second shoe as your “before” reference so you can actually see whether your technique is working, rather than guessing from memory.
Skip fabric softener in this routine entirely. It leaves a film that attracts dirt faster and can affect breathable mesh panels.
Material-by-material instructions: leather, suede, canvas, mesh, and rubber
Treating every sneaker the same way is the fastest route to a ruined pair. Here’s how the major materials actually respond to cleaning.
Leather tolerates the least moisture of any common sneaker material. Wipe it down with a barely damp cloth rather than saturating it, and always work in the direction of the grain. Once it’s dry, a leather conditioner restores the oils that soap strips away and helps prevent cracking down the line. Skip conditioner on patent or coated leather, since it can leave a hazy film.
Suede and nubuck are the trickiest textures on this list, mainly because water is the enemy. A dedicated suede brush lifts dirt without flattening the nap, and a suede eraser (a dry, rubbery block) handles small scuffs without any liquid at all. For water stains specifically, white vinegar on a cloth, applied lightly, can even out the discoloration better than soap. If a pair is expensive or the stain is deep, send it to a professional cleaner. Suede punishes guesswork more than any other material here.
Canvas is the most forgiving fabric on a sneaker. It tolerates a full hand-wash with soap and a brush without much risk. For stubborn gray or yellowed patches on white canvas, a baking soda paste worked in with an old toothbrush and left for ten minutes lifts most of what soap alone won’t. Machine washing is only appropriate if the manufacturer’s care label allows it.
Mesh and knit uppers need a lighter hand than canvas. The weave is thinner and can stretch or fray under aggressive scrubbing, so use gentle circular motions and a soft brush rather than digging in. A delicate machine cycle is possible for many knit sneakers, but only with the precautions covered in the next section; hand cleaning stays the safer default.
Rubber midsoles are the most durable part of the shoe and the most forgiving to clean aggressively. Baking soda paste, a dab of white (non-gel) toothpaste, or a damp Magic Eraser all lift scuffs and yellowing on rubber effectively. The one caution: some midsoles have a coated or painted finish rather than raw rubber, and heavy abrasion can wear through that coating and expose a duller material underneath. Check a small spot first if you’re not sure which you’re dealing with.
For readers weighing which materials are easiest to maintain before a purchase, our guide to what to consider when shopping for sneakers breaks down how construction and material choice affect long-term care.
When is it safe to machine wash sneakers?
Canvas sneakers and many all-synthetic pairs generally tolerate a washing machine. Leather, suede, and premium knit uppers do not; the agitation, heat, and prolonged soaking common in a wash cycle tend to warp shapes, crack leather, and mat suede beyond repair.
If your pair qualifies, the setup matters as much as the decision to wash at all:
- Remove laces and insoles, and hand-clean any heavy surface dirt first
- Place the shoes inside a mesh laundry bag
- Add a couple of old towels to the load to cushion impact and balance the drum
- Use a liquid detergent rather than powder, since powder can leave residue trapped inside the shoe
- Select a cold or 30°C max, delicate/gentle cycle with a low spin speed
Skip the tumble dryer completely once the cycle finishes. Manufacturer guidance across the industry is consistent on this point: machine washing suits synthetic or fabric sneakers when done at low temperatures, but heat is the one variable that turns a safe wash into a ruined pair.
Running shoe manufacturers add one more layer of nuance worth checking before you load the drum: hand cleaning is often the recommended default even for shoes marketed as machine-washable, since wash-machine permissibility genuinely varies by shoe rather than by material category alone. For garment-care fundamentals that transfer well to fabric footwear, this guide to gentle machine washing covers the same cold-cycle, mesh-bag logic in more depth.
How do you remove yellowing from sneaker soles?
Yellowing comes from oxidation. UV exposure and simple age break down the polyurethane in translucent or white soles, and that chemical shift is what turns clear or bright white plastic a dingy amber. No DIY method reverses that process completely on badly aged soles, but two approaches make a real, visible difference.
- Baking soda and hydrogen peroxide paste. Mix baking soda with 3% hydrogen peroxide until it forms a thick paste, then spread it directly onto the yellowed area. Let it sit for 30 to 60 minutes in indirect light, then rinse clean with a damp cloth. This combination lifts light-to-moderate yellowing on rubber midsoles and white canvas without much risk.
- The Salon 40 method for stubborn cases. A 40-volume cream developer (the kind used in hair salons) paired with UV exposure is one of the more effective ways to strip yellowing from icy or translucent soles, but it’s a stronger oxidizer than anything in a kitchen cabinet. That means it’s also more effective and riskier than household peroxide, and it demands real precautions: mask every part of the upper with painter’s tape, wear gloves, work in a ventilated space, and expect to repeat the treatment over multiple sessions rather than one sitting.
Pro Tip: Short bursts of direct sunlight can actually help activate a peroxide or Salon 40 treatment, but leaving white shoes in the sun for hours afterward does the opposite; prolonged UV exposure is one of the main causes of yellowing in the first place.
If a pair is expensive, vintage, or the yellowing runs deep into the material rather than sitting on the surface, a commercial sole restorer or a professional sneaker cleaning service is the safer bet over a DIY chemical treatment.
Drying, storage, and how often to clean your sneakers
Heat is the single biggest threat to a sneaker’s construction, more than dirt or stains ever are. Tumble dryers and space heaters soften the adhesives holding soles to uppers, which is a common cause of premature shoe failure. Air-dry every pair in a shaded, ventilated spot instead, and give them the full time they need rather than rushing them back into rotation.
A few habits extend the life of a clean pair well past the wash itself:
- Drop a silica gel packet into shoes during long-term storage to control moisture and odor
- Rotate between at least two pairs of daily shoes so foam midsoles get time to decompress
- Let insoles dry completely on their own before sliding them back in; trapping moisture inside breeds odor fast
- Apply a waterproofing or protector spray sparingly, and always test it on a hidden patch first, since some sprays discolor light fabrics
For frequency, spot-treat anything fresh the moment it happens. Beyond that, a light clean every two to six weeks is reasonable for shoes in regular rotation, adjusted up if you’re wearing the same pair daily in messy conditions.
What tools and cleaners should you actually use?
Not every cleaner belongs on every material, and mismatching the two is where most damage happens.
- Magic Eraser: Limited strictly to rubber midsoles and scuff marks. It’s genuinely abrasive, and using it on soft uppers will dull or damage the finish fast.
- Mild dish soap or liquid detergent: The universal starting point for nearly every material. Stick to liquid forms diluted in warm water rather than concentrated pours.
- Baking soda: Doubles as a whitening agent and a deodorizer. Mix roughly two parts baking soda to one part water (or peroxide) for a workable paste rather than a runny mix.
- Hydrogen peroxide vs. Salon 40: Household 3% peroxide is mild enough for regular whitening jobs; Salon 40 cream developer is far stronger, needs careful masking, and carries a real risk of bleaching uppers if it isn’t contained.
Our team’s field-tested tips and troubleshooting
We’ve cleaned enough sneakers around the Lizard’s Lunch office to know the theory only gets you so far. The habits that actually save a pair happen in the first sixty seconds after a stain lands, not during a weekend deep-clean session.
Fresh mud wiped off with a damp cloth in the first few minutes almost never leaves a mark. The same mud left to dry for a day turns into a scrub-and-pray situation, and sometimes a permanent shadow on light canvas.
Keep a small pack of sneaker wipes or a damp microfiber cloth somewhere accessible, a bag, a car console, a desk drawer, so a spill doesn’t have to wait until you’re home to get treated. And always test a new cleaner on a hidden patch first; a five-minute patch test is cheap insurance against ruining a $150 pair over an untested chemical reaction.
Pro Tip: If a stain doesn’t budge after two honest attempts, stop. Continuing to scrub usually just spreads the damage. A cobbler or a professional sneaker restoration service can often save a pair that DIY methods have already made worse.
How do you clean laces and insoles, and when should you replace them?
Laces and insoles take more direct contact with grime and sweat than any other part of the shoe, and they’re the easiest pieces to clean separately from the upper.
For laces, pull them out entirely and soak them in a bowl of warm water with a small amount of dish soap for 15 to 20 minutes. Scrub any stubborn spots with an old toothbrush, rinse, and let them air dry fully before relacing. White laces respond well to the same baking soda paste used on canvas. If laces are frayed, thinning at the tips, or permanently gray no matter how much you scrub, replace them; a $5 set of new laces does more for a sneaker’s appearance than another cleaning attempt on old ones.
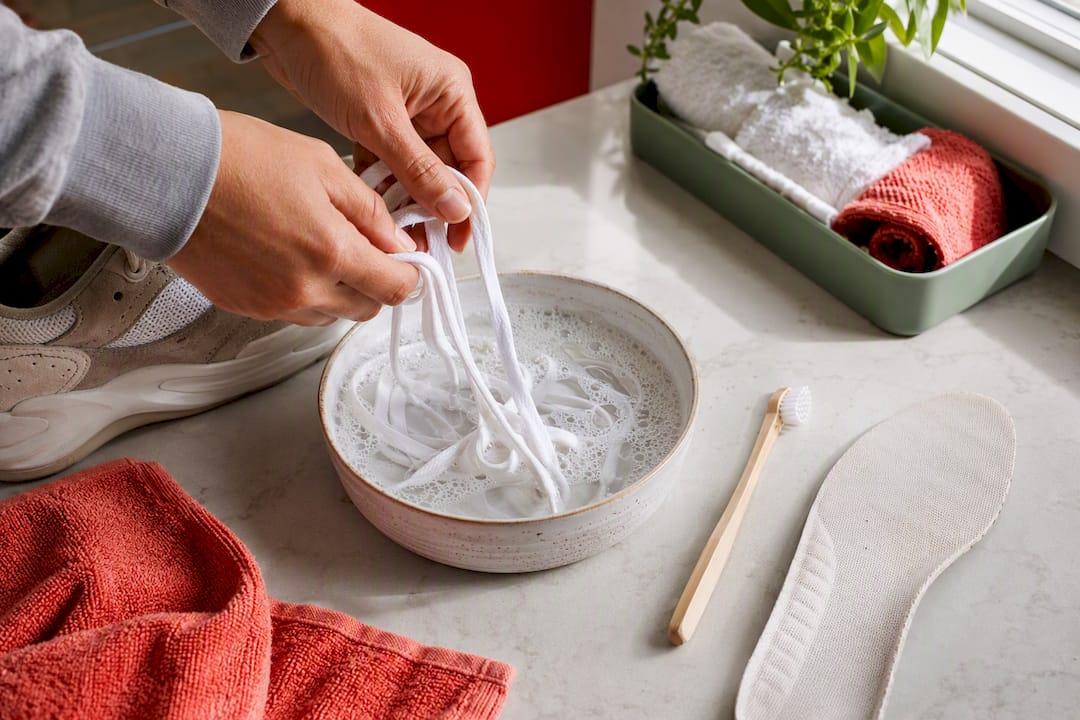
Insoles need gentler handling since many are foam and can lose their shape if soaked. Wipe them down with a cloth dampened in soapy water rather than submerging them, and let them dry completely, ideally overnight, before sliding them back into the shoe. A damp insole trapped inside a closed shoe is one of the fastest ways to grow odor-causing bacteria.
Replace insoles when they’ve flattened out, developed a permanent odor that survives cleaning, or show visible cracking in the foam. Most insoles are good for six to twelve months of regular wear, and swapping them is far cheaper than replacing the whole shoe once cushioning breaks down.
How do you clean mud, grass, ink, and oil stains properly?
Each of these stains responds to a different approach, and using the wrong one tends to set the stain deeper rather than lift it.
Mud is the easiest fix if you let it dry first rather than rubbing it in wet. Once it’s fully dried, brush off as much as possible with a dry brush, then treat any remaining shadow with your standard soap-and-water routine.
Grass stains are trickier because they involve plant pigment, not just dirt. A little rubbing alcohol dabbed on with a cotton ball before your regular soap wash helps break down the pigment; test it on a hidden spot first, since alcohol can affect some dyes.
Ink stains respond best to isopropyl alcohol applied with a cotton swab, dabbing rather than rubbing, working from the outside of the stain inward so it doesn’t spread. This works on canvas and many synthetics but is riskier on suede, where alcohol can leave a ring.
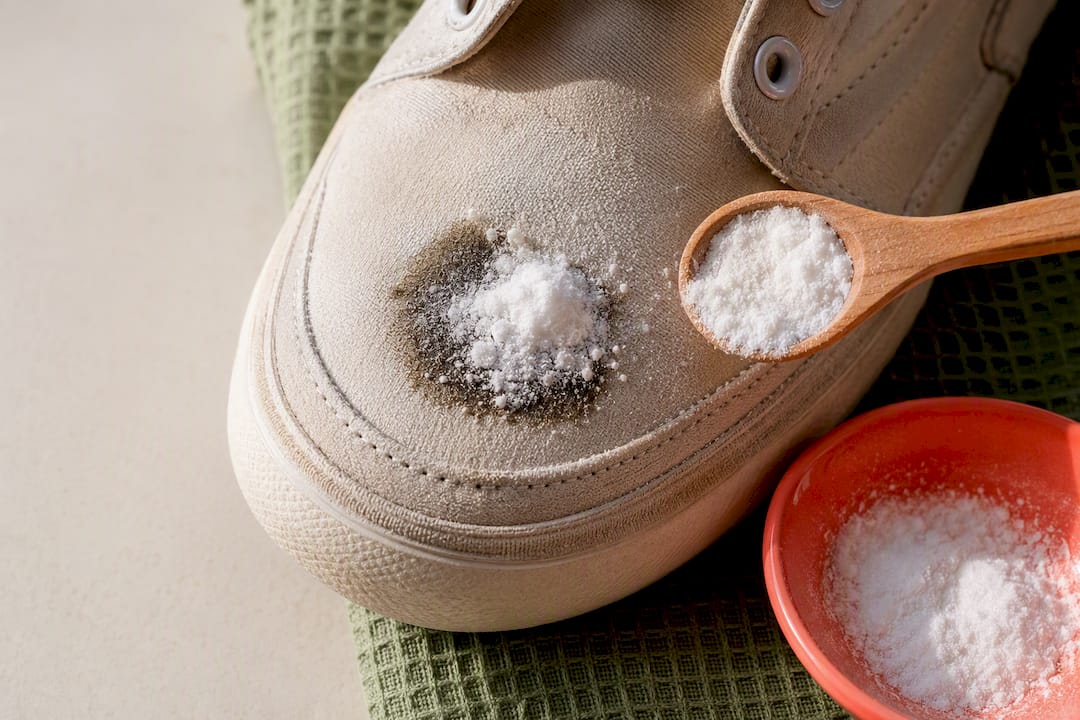
Oil and grease need something that actually absorbs the oil rather than just wiping it around. Cover the fresh stain with a generous layer of baking soda or cornstarch, let it sit for a few hours to pull the oil out, then brush it away and follow with a normal soap cleaning. Never apply heat to an oil stain; it sets the grease into the fabric instead of lifting it.
What actually gets rid of sneaker odor?
Odor lives in the insole and the internal lining, not the outer material, which is why surface cleaning alone rarely solves it.
Baking soda is the simplest fix: sprinkle a generous amount directly into each shoe, let it sit overnight, and shake it out in the morning. For a deeper approach, fill an old sock with baking soda, tie it off, and drop one into each shoe for a few days between wears. Cedar shoe trees do double duty here, absorbing moisture while adding a mild, pleasant scent as they dry the shoe from the inside.
For shoes with a persistent smell that survives baking soda, the insoles themselves may need a proper wash or a replacement, since the odor is often trapped in foam that’s absorbed sweat over months. Letting shoes fully air out between wears, rather than wearing the same pair two days running, does more for long-term odor control than any spray or powder applied after the fact. Moisture that never fully evaporates is what feeds the bacteria causing the smell in the first place.
What eco-friendly cleaning alternatives actually work?
Most of the household staples already covered here double as environmentally friendly swaps for commercial sneaker cleaners, so going green rarely means sacrificing results.
White vinegar diluted with water handles mineral stains and mild discoloration without the synthetic fragrances and preservatives found in many commercial shoe cleaners. Baking soda covers whitening, deodorizing, and light stain lifting in one ingredient that’s cheap, biodegradable, and already sitting in most kitchens. Castile soap, a plant-based liquid soap, works as a gentler substitute for dish soap on delicate mesh or knit uppers.
For drying and storage, skip aerosol deodorizing sprays loaded with propellants in favor of the baking soda sock method, and reach for a reusable microfiber cloth instead of disposable wipes for routine wipe-downs. None of these swaps cost more than their commercial counterparts, and most sneaker owners already have the ingredients on hand.
What common mistakes ruin sneakers during cleaning?
The damage from a bad cleaning attempt is almost always worse than the stain that started it. A few mistakes show up again and again.
- Using hot water instead of warm, which can warp glue bonds and shrink certain fabrics
- Skipping the dry-brush step and scrubbing wet dirt directly into the material
- Applying a Magic Eraser to leather, suede, or painted logos instead of keeping it to rubber
- Drying shoes with a hair dryer, heater, or in direct sun, which softens adhesives and accelerates yellowing
- Soaking suede or nubuck in water when a dry brush and eraser would have handled it
- Skipping the patch test and finding out a cleaner discolors the material only after it’s too late
Most of these come down to impatience, treating every stain like an emergency that needs the strongest tool available. The gentlest method that works is almost always the right one to reach for first.
Our take: the smartest sneaker care skips the extremes
The research on sneaker care keeps pointing to the same conclusion: the gentlest method that solves the problem beats the strongest one every time. Most sneaker damage we’ve seen doesn’t come from dirt. It comes from someone reaching for a Magic Eraser on suede or blasting a wet shoe with a hair dryer because air drying felt too slow.
Conventional advice oversells commercial sneaker cleaners and undersells what’s already in a kitchen cabinet. Dish soap and baking soda handle the vast majority of stains and dinginess that send people shopping for specialty products. The exception worth respecting is yellowing. Salon 40 works, but it’s a genuine chemical treatment, not a household trick, and it deserves the same caution you’d give any strong oxidizer near fabric.
Prioritize prevention over restoration. A shoe wiped down the day a stain happens rarely needs the aggressive treatments covered here at all. That single habit, more than any product, is what keeps a sneaker looking new longest. If you’re building broader habits around caring for what you own rather than replacing it, our guide on everyday healthy living choices covers some of that same mindset beyond footwear.
— Alexander
Sources
Manufacturer care instructions vary by shoe, so check the label sewn into the tongue or the brand’s own care page before applying any method here. Nike’s official shoe cleaning guide covers general maintenance, while On Running’s care instructions address performance mesh specifically. For a deeper look at material-specific leather upkeep, this guide to sustainable leather repair offers useful crossover techniques.















Leave a Comment
Your email address will not be published. Required fields are marked with *