
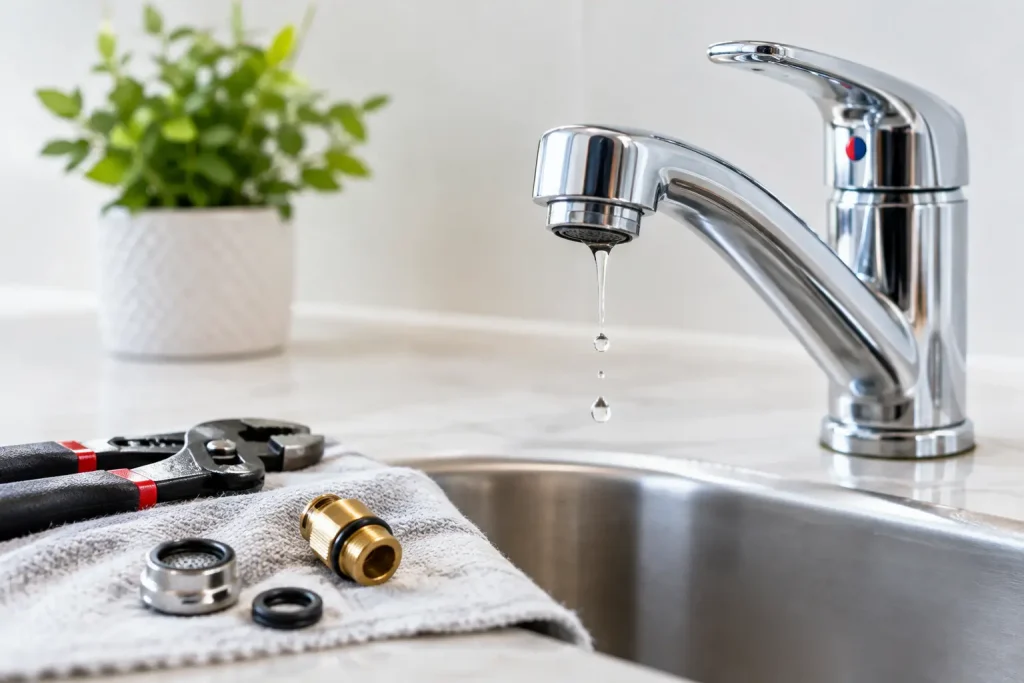
Learn how to fix a dripping faucet with simple tools, clear repair steps, and tips for knowing when a worn part or plumbing issue needs a pro instead.
That steady drip is more than a nighttime annoyance. A faucet that leaks once per second can waste thousands of gallons over a year, adding unnecessary cost to a utility bill and potentially leaving mineral stains in the sink. The good news is that most homeowners can fix a dripping faucet in an afternoon with a few basic tools and the right replacement part.
The key is not rushing to take the handle apart before you know what type of faucet you have. A leaking faucet may need a low-cost washer, O-ring, cartridge, or valve seat repair. Buy the wrong part, and a quick project turns into several trips to the hardware store.
Start by finding where the drip begins
Turn off the faucet and look closely at the fixture. Water dripping from the spout after the handle is fully closed usually points to a worn internal seal or cartridge. Water collecting around the base of the handle often means an O-ring, packing nut, or cartridge seal has failed.
Also check whether the leak happens only when the faucet is running. If water appears beneath the sink, the problem may be a loose supply-line connection, a failing shutoff valve, or a drain issue rather than the faucet itself. Put a dry paper towel around connections under the sink, then run both hot and cold water for a minute. The towel will make a slow leak easier to spot.
Before disassembling anything, plug the sink drain. Tiny screws, clips, and springs have a remarkable ability to disappear into a drain opening.
Tools to gather before you fix a dripping faucet
Most faucet repairs call for an adjustable wrench, Phillips and flat-head screwdrivers, Allen wrenches, needle-nose pliers, and a small towel or rag. A flashlight helps, especially for kitchen faucets with tight clearances.
You may also need plumber’s grease, white vinegar, and a replacement cartridge, washer, O-ring, or seal kit. Plumber’s grease is silicone-based and safe for faucet parts. Do not substitute petroleum jelly, which can damage certain rubber components over time.
If you do not know the faucet brand or model, take clear photos before removing parts. Bring the old cartridge or worn washer to a hardware store for a close match. Cartridge shape, stem length, spline count, and seal placement all matter.
Shut off the water correctly
Look under the sink for two oval or round shutoff valves, one for hot water and one for cold. Turn both clockwise until they stop. Then open the faucet to relieve pressure and confirm the water is off.
A valve that has not been moved in years may resist turning. Do not force it hard enough to snap the handle or fitting. Apply gentle pressure, and consider calling a plumber if the valve is corroded, dripping, or frozen in place. Replacing a faulty shutoff valve is manageable for experienced DIYers, but it can become a larger repair quickly.
If there are no local shutoff valves, turn off the home’s main water supply. Let everyone in the house know before you do so.
Identify your faucet type
The repair process depends on the mechanism inside. Most residential faucets fall into four categories.
A compression faucet has separate hot and cold handles that require several turns to open or close. These older-style faucets commonly drip because a rubber washer at the end of the stem has worn down.
A cartridge faucet may have one handle or two handles, but its handle movement feels smooth rather than threaded. A removable cartridge controls water flow, and replacing it is often the most reliable repair.
A ball faucet is usually a single-handle kitchen faucet. Inside, a metal or plastic ball works with small rubber seats and springs. It has more pieces than other styles, so laying them out in removal order is helpful.
A ceramic-disc faucet has a modern, smooth handle and durable ceramic cylinders inside. It is less likely to leak, but mineral buildup, damaged seals, or a cracked disc can still cause trouble.
How to fix a dripping faucet with a compression stem
Remove the decorative cap on the handle, if present. It may pop off with a flat screwdriver. Remove the handle screw, then lift off the handle. If it sticks, wiggle it gently rather than prying against the faucet body.
Use an adjustable wrench to loosen the packing nut, then pull out the stem assembly. At the bottom, you should find a rubber washer held by a small screw. Inspect it for flattening, tears, stiffness, or an uneven edge. Replace it with an identical washer and reinstall the screw securely without stripping it.
Look into the faucet body at the valve seat, which is the metal surface that meets the washer. Roughness or corrosion can prevent a new washer from sealing. A valve-seat wrench can remove a replaceable seat, while minor buildup may come off with vinegar and a soft cloth. Reassemble the stem, reinstall the handle, turn on the water, and test the faucet.
Replacing a cartridge in a single-handle faucet
Cartridge faucets vary by brand, but the basic approach is similar. Find the set screw, often tucked beneath a small cap or behind the handle. Loosen it with the appropriate Allen wrench, then pull the handle off.
Remove the retaining nut or U-shaped retaining clip that holds the cartridge in place. Take a photo before lifting anything out. Pull the cartridge straight up, noting its orientation. Some cartridges need a specialized puller if mineral deposits have effectively glued them in place.
Clean mineral scale from the faucet body with vinegar on a cloth. Avoid scraping aggressively inside the valve housing, as a gouge can create a new leak path. Apply a thin layer of plumber’s grease to the new cartridge O-rings, insert it in the same direction as the old one, and reinstall the clip or nut.
If the hot and cold positions are reversed after reassembly, the cartridge may be rotated incorrectly. Shut off the water again and turn the cartridge 180 degrees if the manufacturer design permits it.
Ball and ceramic-disc faucet repairs
For a ball faucet, remove the handle, cap, and cam assembly to access the ball. Examine the rubber seats and tiny springs below it. These inexpensive parts are frequent causes of a dripping spout. Replace them as a matched set, then inspect the ball for scratches, cracks, or worn areas before reassembly.
For a ceramic-disc faucet, remove the handle and lift out the disc cylinder. Check the rubber seals on its underside and clean mineral deposits from the cylinder openings. If the ceramic surfaces are chipped or cracked, replace the entire disc cylinder. Ceramic parts are tough, but they are not repairable once damaged.
Common mistakes that make faucet repairs harder
The most common mistake is buying a replacement part based only on appearance. Similar-looking cartridges can have different stem lengths or water ports. Bringing the original part along is safer.
Another issue is overtightening. Faucet screws, packing nuts, and supply connections need to be snug, not aggressively tightened. Too much force can strip threads, crush seals, or crack plastic components.
It is also easy to skip cleaning. A new washer or cartridge may not seal well against an old ring of limescale. A quick vinegar cleaning can make the difference between a lasting repair and another drip the next day.
Finally, do not ignore a leak that continues after replacing the obvious part. A damaged valve seat, cracked faucet body, or high water pressure can keep causing trouble. Repeatedly replacing washers without addressing the underlying surface is money and effort wasted.
When it makes sense to call a plumber
A DIY repair is a smart choice when the shutoff valves work, the faucet comes apart normally, and the leak is clearly limited to a replaceable internal component. Call a licensed plumber when a supply line is leaking, a shutoff valve fails, the faucet body is cracked, or corrosion makes parts impossible to remove safely.
Professional help is also worthwhile for a wall-mounted faucet or a leak that has reached cabinetry, flooring, or the wall behind the sink. Water damage can cost far more than the original faucet repair, so act before a small drip becomes a bigger home project.
Once the repair is complete, leave a dry paper towel beneath the faucet and under the sink for a few hours. If it stays dry and the spout remains quiet, you have solved a small problem that can save water, protect your space, and make the kitchen or bathroom feel right again.
















Leave a Comment
Your email address will not be published. Required fields are marked with *