
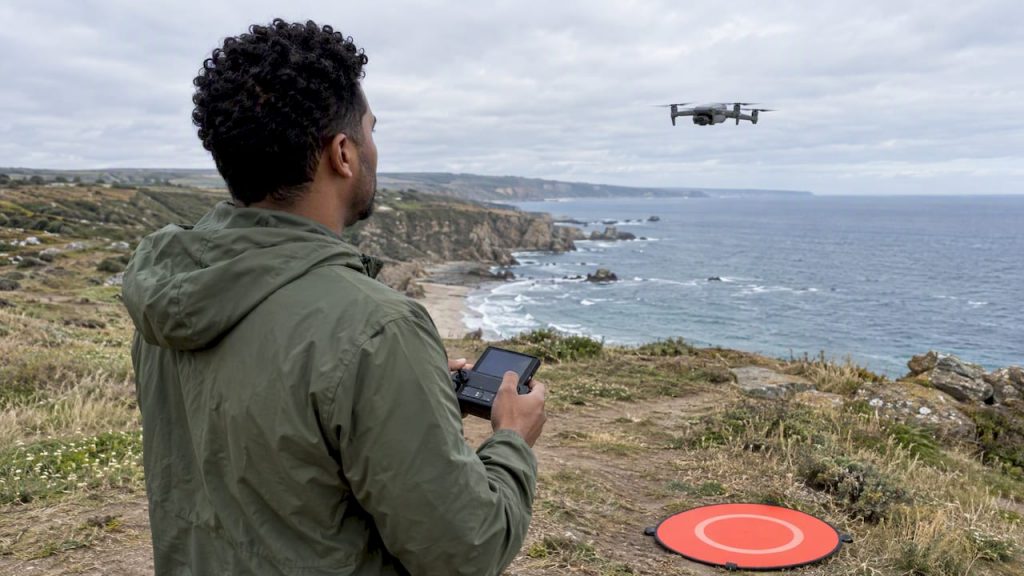
Drone photography tips for Canadian pilots: rules to know, scouting, camera settings, ND filters, composition and editing, so your aerial shots stand out.
Great drone photos come from four habits: knowing the rules where you fly, scouting before you launch, setting the camera by hand, and framing the scene like a photographer rather than a pilot. Get those right and even an entry-level drone can deliver images that look like they belong on a gallery wall. Skip them and you will fly home with a card full of flat, washed-out frames from 120 metres up.
This guide walks you through the whole flow, from the Canadian rules to the final edit. You will find specific camera settings, a plain-English explanation of ND filters, composition ideas that work from the air, and a short look at which drones are worth considering in 2026.
TL;DR
- Check Transport Canada’s rules first: drones of 250 grams or more must be registered and marked, and pilots need the right certificate.
- Scout on satellite maps, plan your shot list, and fly at golden hour so you spend battery on shooting, not wandering.
- Shoot JPG plus RAW, keep ISO low, keep shutter speed fast for stills, and trust the histogram over the screen.
- Use ND filters when you want motion blur in water or clouds, and change altitude to change the story of the scene.
- Pick a drone by sensor and weight, not by the longest spec sheet.
Table of Contents
- Know the rules before you launch
- Scout and plan like a location photographer
- Camera settings that give you clean, sharp stills
- ND filters: when and how to use them
- Composition: think like a photographer, not a pilot
- Flying habits that protect your shots
- Choosing a drone for photography in 2026
- Edit with a light touch
- Our perspective
- Share your aerial work with a wider audience
- FAQ
- Sources
Know the rules before you launch
The most useful tip comes before the camera is even switched on. In Canada, drones weighing 250 grams or more must be registered and marked, while those under 250 grams do not need registration or marking. Pilots of heavier drones also need the appropriate pilot certificate, and Transport Canada sorts operations into basic, advanced and Level 1 complex categories, each with its own rules about how close you can be to bystanders, which airspace you are in and what certification you hold.
For most photographers, that means basic operations: flying in uncontrolled airspace, away from crowds, with the drone in sight. Anything near an airport, a heliport, a park with its own bylaws or a crowd of people needs more thought. Parks, in particular, often have their own restrictions, so check before you assume a scenic lookout is fair game.
Before every shoot, run through this short list:
- Confirm your drone’s weight class and whether it needs registration and a marked number.
- Check the airspace around your location on an official map or a flight-planning app.
- Look up local bylaws and land-owner rules for take-off spots.
- Keep the drone within visual line of sight, and keep a safe distance from people and property.
- Think about privacy: if people are identifiable in your frames, you may need to rethink the shot or ask for permission.
We keep a separate walkthrough of the national framework and its recent changes in our Canada drone laws roadmap. Read it once, then bookmark Transport Canada’s own pages for current details, because rules change and the official site is the final word.
Scout and plan like a location photographer
Shooting from a drone is expensive in time. A typical battery gives you a limited window, and a good part of that is eaten up by take-off, climbing to height and landing with a safe reserve. Planning ahead conserves battery, and it is the single biggest difference between pilots who return with five great images and those who return with fifty average ones.
Use satellite maps to find the shot
Open Google Earth or a similar satellite view the night before. Look for:
- Leading features: rivers, roads, shorelines, fences and boardwalks that can pull the eye through the frame.
- Pattern and texture: farm fields, tidal flats, rows of containers, clusters of rooftops.
- Take-off access: a legal, safe place to launch with a clear view of where the drone will be.
- Light direction: where the sun will rise or set relative to your subject.
The same planning guide recommends scouting with tools like Google Earth to assess access and pick the best shooting time for natural light. Pair that with a weather app that shows wind at altitude, not just at ground level. Wind that feels gentle on the ground can be strong at 100 metres, and a shaky gimbal helps nobody.
If you travel for your shoots, the same logic applies to unfamiliar cities. Local permits, access and light vary a lot, and a guide on scouting urban locations abroad shows how much groundwork professional crews put in before they ever roll a camera. You do not need a crew, but you do need the habit.
Make a shot list
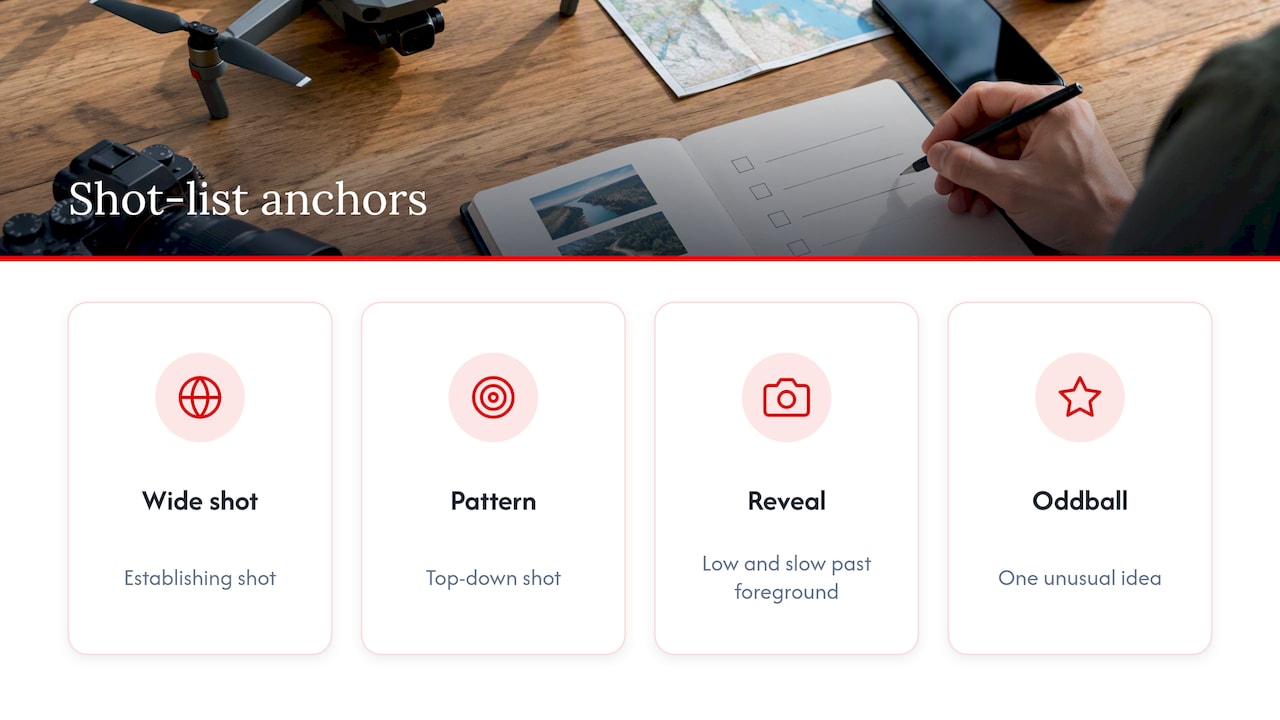
Write down three to five shots before you launch. For example: a wide establishing shot, a top-down pattern shot, a low and slow reveal past a foreground element, and one oddball idea. A short list keeps you from circling aimlessly and gives you a reason to land when the list is done.
Chase the right light
Midday sun flattens landscapes and blows out highlights. Sunrise and sunset bring long shadows that reveal texture and warm colour. Blue hour, the stretch after sunset, can produce soft, even light, but your drone’s sensor will struggle, so keep your expectations realistic and your ISO as low as you can manage.
Camera settings that give you clean, sharp stills
Auto mode is fine for learning the controls. For images you want to print or edit seriously, take control. Here is a reliable starting point.
| Setting | Starting point | Why it matters |
|---|---|---|
| File format | JPG + RAW | JPG for quick sharing, RAW for editing latitude |
| ISO | As low as possible (ISO 100 in daylight) | Keeps noise down |
| Shutter speed | At least 1/500s for stills | Freezes vibration and drone movement |
| White balance | Set manually | Keeps colour consistent across a series |
| Exposure check | Histogram | Screens mislead in bright light |
The figures above follow a drone photography settings guide: use the lowest ISO possible, a shutter speed of at least 1/500s for sharp stills, and manual white balance. The same source notes that holding ISO at 100 in daylight is standard to reduce noise, and that you should raise it only when you need a faster shutter and cannot adjust aperture.
Why RAW matters
JPG files are processed and compressed in the drone. RAW files keep the sensor’s full information, so you can pull detail back from bright skies and lift dark foregrounds. Shooting both formats gives you something to share immediately and something to edit later. The cost is storage, so carry a fast, high-capacity card.
Trust the histogram, not the screen
Your phone or controller screen is a poor judge of exposure, especially in bright sun. Practitioners point out that drone screens are unreliable for judging exposure, which makes the histogram an essential tool for protecting highlights in scenes with a wide range of brightness. If the graph piles up against the right edge, you are clipping highlights, and RAW cannot rebuild what the sensor never recorded. Dial exposure down a touch. Shadows are far easier to recover than blown skies.
Bracket for tricky scenes
Sunsets are the classic case: a bright sky and a dark land below. Use auto exposure bracketing if your drone offers it, then blend frames later, or simply expose for the sky and lift shadows in your RAW editor. Either way, keep the drone steady between frames and let it settle in a hover before you press the shutter.
Is 720p good enough?
This question often confuses new pilots. The 720p figure usually refers to a low-resolution video transmission or preview on your screen, not to the photo your drone saves. Still-photo quality depends on the drone’s sensor, lens and manual settings such as RAW capture, not on that preview resolution. As a resolution for capturing images you want to keep, 720p is too low for quality photography, so check the sensor and still resolution on the spec sheet instead.
ND filters: when and how to use them
An ND (neutral density) filter is sunglasses for your drone’s camera. It cuts the amount of light reaching the sensor without changing colour, which lets you use a slower shutter speed or a wider aperture in bright conditions. According to DJI’s own explainer, ND filters let photographers use longer shutter speeds in bright light for effects like blurring flowing water or clouds, and a broader aperture without overexposure.
Choosing a strength
The number after ND tells you how much light is blocked. The same guide says an ND8 can create slight motion effects, while ND64 is often used for blurred-motion effects in bright daylight. A practical way to think about it:
- ND8: a good first filter for overcast days or for gentle softening of motion.
- ND16 to ND32: useful in brighter conditions when you want smoother water without going fully silky.
- ND64: bright daylight and strongly blurred water or clouds.
When not to use one
Most drone stills do not need an ND filter. If you want to freeze a scene, keep the shutter fast and leave the filter at home. Slower shutter speeds also make shake more visible, so a filter is best for stable, calm conditions and for drones with a good gimbal. Fit filters on a clean lens, and always check that the filter is compatible with your specific model before you buy.

Composition: think like a photographer, not a pilot
The sky is a big, empty canvas. The hard part is deciding what belongs in the frame. Turn on the grid overlay and use it. Guides recommend the rule of thirds with grid overlays to balance subjects with other elements, and experimenting with altitude to change the scale and texture of the landscape.
If you want to practise the basics of framing and balance without a drone in the air, try the ideas in this piece on how to photograph your own work on a phone. The principles of clean backgrounds, thoughtful crops and consistent light carry over to aerial work more than you might expect.
Shots worth trying
- Leading lines: roads, rivers and shorelines that guide the eye diagonally through the scene.
- Top-down patterns: shooting straight down reveals geometry that you never see from the ground. It is a popular technique, but it works best when something in the frame gives scale, so look for a person, a boat or a car.
- People in the landscape: a small figure on a beach or a trail instantly tells viewers how big the place is.
- Texture and abstract frames: crop tight on ice, sand, crops or tidal channels, and let the shapes carry the image.
- Low and slow reveals: start close to a foreground element, then rise to show the scene behind it.
- Layers: foreground, mid-ground, background. Depth makes a picture feel three-dimensional.
Vary your altitude
Pilots often go straight to the legal maximum height and stay there. Resist that. Between 10 and 40 metres, you can capture a perspective that feels close to human, with real texture. At higher altitudes, details shrink and the image becomes more graphic. Take the same scene at three heights and compare.
Learn from landscape masters
The best aerial photographers borrow from the people who spent decades in the field. Our profile of famous landscape photographers is a good place to study how light, patience and composition create lasting images. You will find that a lot of their lessons apply directly to what you do from a drone. For more ideas, browse our photography section.
Flying habits that protect your shots
Good technique in the air supports everything above.
- Practise first. Use a simulator or an open field before you attempt a tricky location. Smooth, slow stick movements make sharper photos.
- Learn to fly without GPS assistance. Signals drop out, and you want to be able to hold position and land calmly.
- Check your gimbal and lens. A smudge on the lens is the cheapest way to ruin an otherwise perfect sunset.
- Hover, wait, then shoot. Let the drone settle for a second after each move.
- Watch the battery. Land with a healthy reserve, and swap batteries before the light peaks, not after.
- Keep it in sight. Staying within visual line of sight is both a legal expectation in basic operations and the best way to avoid trouble.
In cold Canadian weather, keep batteries warm in a pocket until you launch, because chilled batteries lose capacity quickly. Wind and snow add challenges of their own, so give yourself extra margin in winter.
Choosing a drone for photography in 2026
You do not need the most expensive drone to take excellent pictures. You need the right balance of sensor size, portability and rules that fit how you fly. Here are a few popular options from the maker’s own pages.
| Drone | Notable photography features | Listed price |
|---|---|---|
| DJI Mini 4 Pro | Weighs under 249 g, which keeps it under the registration threshold | From US$759 |
| DJI Air 3S | Dual camera with a 1-inch CMOS main sensor and a 70 mm medium tele camera, plus omnidirectional obstacle sensing | From US$1,099 |
The prices come from the DJI store listing for Canada and are shown in US dollars, so check the checkout page for the Canadian amount, taxes and bundle contents. The Air 3S is designed for travel photography, with a 1-inch sensor that helps in lower light and a tele lens for compressed, layered compositions. The Mini 4 Pro suits pilots who value portability and simpler paperwork, since the Mini 4 Pro weighs under 249 g. If you are curious about immersive flying rather than stills, DJI also lists an FPV model, the Avata 2, with a 1/1.3-inch sensor and an integrated propeller guard, though it is aimed at a different style of shooting.
How to choose
- Sensor size: a bigger sensor generally handles low light and high contrast better.
- Weight: under 250 grams is easier on paperwork, but always confirm the current rules for your use.
- Lens options: a second, longer lens lets you compress distance and isolate details.
- Battery life and spares: more flight time means more time to wait for light.
- Filter support: check that ND filters exist for your model.
- Total cost: budget for spare batteries, filters, a fast memory card and a good case.
Edit with a light touch
Editing is where good drone photos become great ones, and where many beginners overdo it. Start with the basics: straighten the horizon, crop for balance, lower highlights to bring detail back in clouds, and lift shadows gently. Photographers in community discussions often say that a light touch on the sliders produces the most believable results, and that heavy saturation and extreme contrast age badly.
A simple workflow:
- Import RAW files and cull the weak ones fast.
- Fix exposure and white balance.
- Pull highlights down and lift shadows moderately.
- Add a little contrast and clarity, not a lot.
- Remove sensor dust spots and any distracting objects.
- Export one version for screens and one for print.
Compare your edits on different devices. A photo that looks stunning on a bright phone can look muddy on a laptop.
Our perspective
We see the same pattern again and again in the guides and gear conversations we follow: beginners buy a drone, chase the highest altitude, and are disappointed. The pilots who improve fastest slow down. They treat each flight as a short photo walk, with a plan, a shot list and a respect for the rules that keep the hobby open to everyone.
Our advice is to spend your first month on one location you can visit often. Fly it at sunrise, at sunset and on a cloudy day. Change the altitude, change the angle, and review every frame critically. You will learn more from twenty visits to one place than from one visit to twenty places. And when the light is not right, stay home, because patience beats gear every time.
We also think responsible flying is part of the craft. Read the official guidance, respect privacy, and leave wildlife and crowds alone. The best aerial photograph is never worth a fine, an accident or a disturbed nesting site.
— Alexander
Share your aerial work with a wider audience
If you have built up a body of drone photography or practical flying experience and want to reach readers who love travel, gadgets and hobbies, our team at Lizard’s Lunch welcomes pitches. You can see what is available on our advertise with us page, including guest post opportunities.
FAQ
How do you take a good drone photo?
Plan first: scout the location on a satellite map, check the airspace and choose a time with good light. In the air, shoot JPG plus RAW, keep ISO low and the shutter fast, and use the grid overlay to place your subject. Check the histogram to protect highlights, then take the same scene at several altitudes.
Do I need to register my drone in Canada?
If your drone weighs 250 grams or more, it must be registered with Transport Canada and marked with the registration number, and the pilot needs the appropriate certificate, according to Transport Canada’s guidance. Drones under 250 grams do not need registration or marking. You should still check airspace, bylaws and privacy before you fly.
What ND filter should I start with?
Most pilots begin with an ND8 for gentle motion effects and add stronger filters such as ND64 for blurred water or clouds in bright daylight, as described in DJI’s ND filter guide. If you mainly shoot sharp landscapes, you may not need one at all. Always check that a filter fits your exact drone model.
Is 720p good enough for drone photography?
No, not for quality stills. Photo quality depends on the sensor, the lens and your settings, and 720p usually describes a low-resolution video preview rather than your saved images. Check the still resolution and sensor size on the drone’s spec sheet.
Sources
- Flying your drone safely and legally, Transport Canada
- Drone law in Canada: new rules and current regulatory environment, Osler
- Drone Photography Planning (Explained for Beginners)
- Drone Photography Guide: Tips, Settings and Techniques
- Best Drone Camera Settings for Landscape Photography
- ND Filters for Your Drone and Camera, DJI
- DJI Store Canada
- DJI Air 3S
- DJI Mini 4 Pro
- Camera drones, DJI Store








Leave a Comment
Your email address will not be published. Required fields are marked with *