
Compare seven home coffee brewing methods with starter recipes, single-variable tuning steps, and a one-fast, one-slow plan to improve your daily cup.
Pour-over, Aeropress, French press, drip, moka pot, cold brew, and espresso all produce genuinely good coffee at home, and none of them is universally “the best.” The right home coffee brewing method depends on how much time you have, how much control you want over the process, and whether you prefer a light, tea-like cup or something thick and syrupy. Pick for speed if mornings are rushed, pick for control if you like tinkering, and pick for body if you want something that stands up to milk.
TL;DR:
- Using a digital scale to measure coffee and water precisely yields the biggest improvements in brewing consistency and flavor.
- Adjusting grind size is the most effective way to fix issues like sourness or bitterness in your cup.
- Choosing the right method depends on your morning routine: quick for rushed mornings, slow for ritual and flavor, or batch for feeding multiple people.
- Proper storage in airtight, opaque containers and using filtered water help preserve bean freshness and optimize flavor.
- Experimenting with one fast and one slow brewing method and keeping a log accelerates learning and leads to better coffee over time.
Table of Contents
- Which home coffee brewing method fits your morning?
- Pour-over: recipe, technique, and troubleshooting
- Aeropress: fast, flexible, and forgiving
- French press: immersion for body and texture
- Drip and automatic brewers: consistent batch brewing
- Moka pot: stovetop concentrate for milk drinks
- Cold brew: low-acid, make-ahead concentrate
- How to choose and dial in a home brewing method
- Essential kit and affordable upgrades
- Choosing beans and roast level for each method
- Troubleshooting beyond basic extraction
- Storage tips that protect flavor consistency
- Our team’s take: keep it playful, experiment, and log
- Sources
- FAQ
Which home coffee brewing method fits your morning?
Every method rewards a slightly different kind of coffee drinker. The quick reference below pairs each one with its ideal use case, its real tradeoffs, and a starter recipe you can run tonight.
- Pour-over — best for clarity and single-origin flavor. Rewards patience, punishes rushed pours. Start with a typical coffee-to-water ratio, medium-fine grind, 200°F, 3 minutes total.
- Aeropress — best for speed and travel. Forgiving and nearly mess-free, though the cup is smaller than a mug. Start with a moderately concentrated ratio, medium-fine grind, 90 seconds.
- French press — best for body and texture. Full-bodied and rich, but leaves sediment at the bottom. Use a typical immersion ratio, coarse grind, 4-minute steep.
- Drip machine — best for hands-off batch brewing. Consistent and easy, but only as good as the machine’s temperature control. Use a common coffee-to-water ratio, medium grind.
- Moka pot — best for espresso-style concentrate without a machine. Strong and intense, but easy to scorch. Start with hot water, medium-fine grind.
- Cold brew — best for low-acid, make-ahead coffee. Smooth and fridge-stable, though it takes many hours to steep. Use a more concentrated coffee-to-water ratio for the concentrate, coarse grind, long cold steep.
- Espresso — best for milk drinks and small, intense shots. Demands the most equipment and practice of any method here.
This same 1:16 baseline shows up across most starter recipes for home brewing, which makes it a safe place to begin before you adjust to taste.
Pour-over: recipe, technique, and troubleshooting
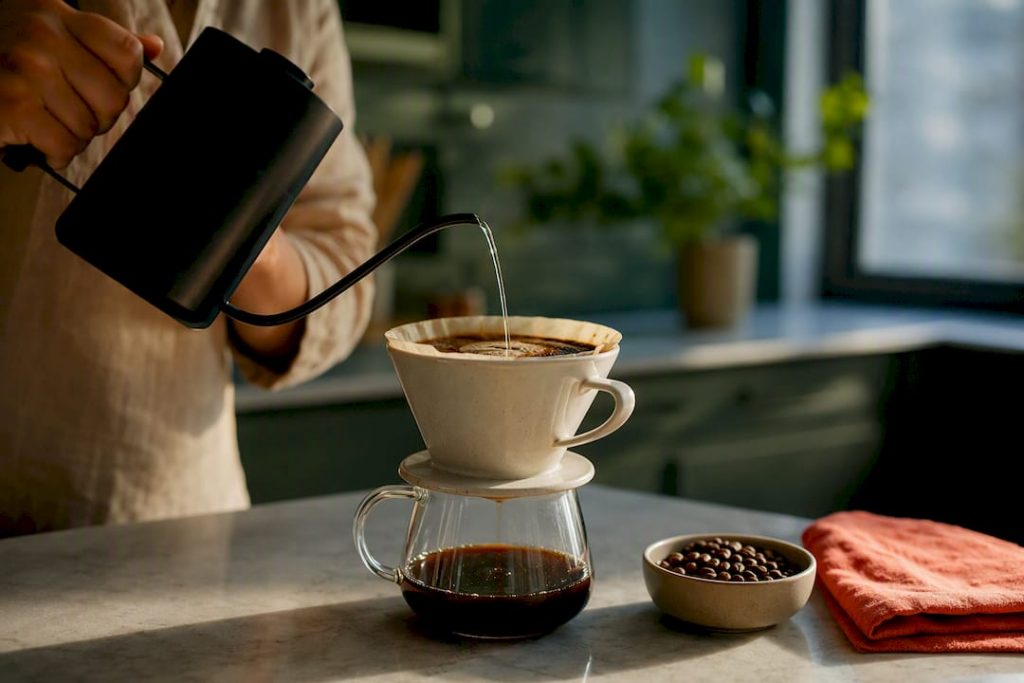
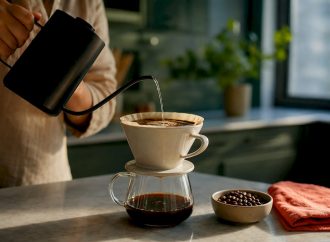
Pour-over earns its reputation for clarity. The slow, controlled pour highlights acidity and delicate flavor notes that get muddied in immersion methods, which is why it’s the go-to for single-origin beans.
Start with a 1:15 to 1:17 ratio, water at 195°F to 205°F, and a medium-fine grind. Bloom the grounds with a small pour for 30 to 45 seconds before continuing, and aim for a total brew time of 2.5 to 3.5 minutes. A gooseneck kettle helps you pour evenly instead of dumping water in one spot. If the brew finishes too fast, grind finer; if it drags past four minutes, grind coarser or check for a clogged filter.
Aeropress: fast, flexible, and forgiving
Aeropress produces a concentrated, clean cup with lower acidity than pour-over, and it does it in under two minutes. That combination of speed and quality is why it’s become a favorite for small kitchens and campsites alike.
A solid starting point is a 1:12 to 1:15 ratio, medium-fine grind, and roughly 60 to 90 seconds from pour to press. Press with steady, even pressure rather than forcing it. The inverted method gives you longer steep control, while the standard method is faster and simpler. Compared to a moka pot, Aeropress offers more temperature control and easier cleanup, though the moka pot wins on producing a darker, fuller concentrate. If your cup tastes thin, use less water or a finer grind.
French press: immersion for body and texture
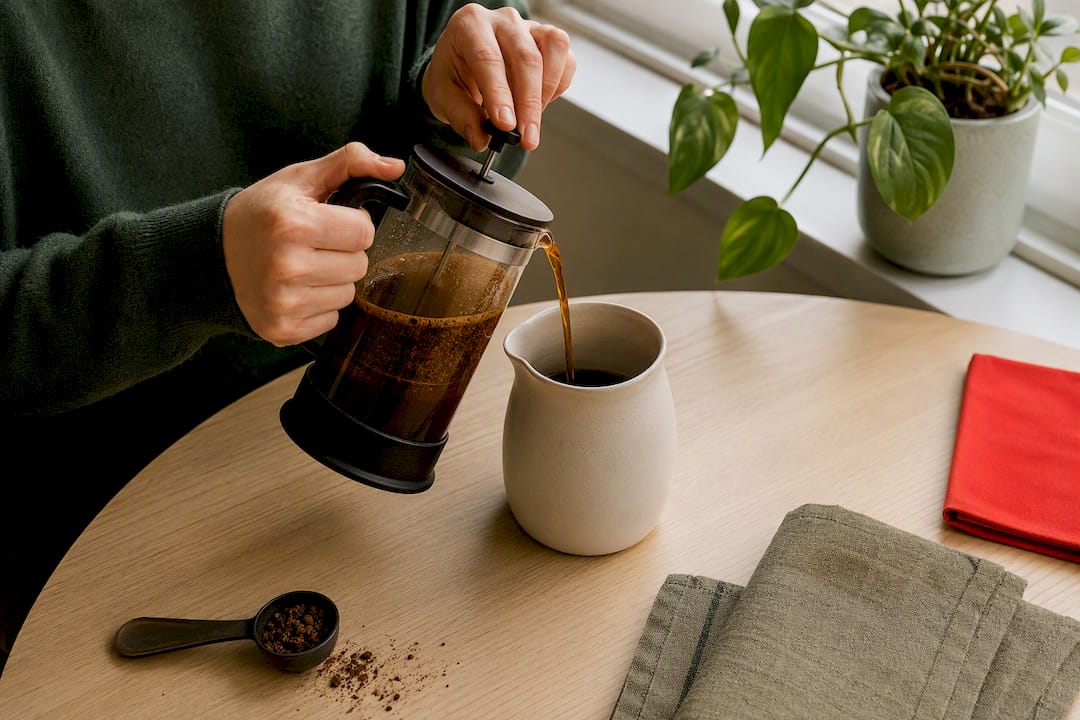
French press is the method for drinkers who want a heavy, oily cup with real texture. Immersion brewing lets natural coffee oils stay in the cup instead of getting trapped in a paper filter, which is exactly why it feels so much richer than drip coffee.
Use a 1:15 to 1:17 ratio, coarse grind, and a 4-minute steep. Plunge slowly and evenly, and decant the coffee into a separate carafe right away so it doesn’t keep steeping and turn bitter. If your cup comes out muddy or gritty, grind coarser and consider pouring through a second, finer filter after plunging.
Drip and automatic brewers: consistent batch brewing
Drip machines exist for one reason: hands-off consistency when you need several cups at once. They’re the right call for households where someone is filling a travel mug at 6:45 AM and doesn’t have time to fuss with a gooseneck kettle.
The quality gap between a mediocre drip cup and a great one usually comes down to three things: whether the machine actually reaches proper brewing temperature, how evenly the showerhead saturates the grounds, and grind consistency. A medium grind suits most machines, matching the core method guidance from the National Coffee Association. Upgrading your grinder, rinsing paper filters before brewing, and using filtered water will improve a drip cup more than buying a pricier machine.
Moka pot: stovetop concentrate for milk drinks
The moka pot makes an intense, espresso-adjacent concentrate using stovetop pressure instead of a pump, which is why it’s a staple for milk-based drinks like lattes and cortados at home.
Use a medium-fine grind, fill the boiler chamber with water just below the safety valve, and start with hot water rather than cold. That single change cuts the time the coffee spends over heat and helps prevent the scorched, metallic bitterness moka pots are famous for. Pull the pot off the burner as soon as you hear sputtering. If the result tastes burnt, use less heat or a slightly coarser grind next time. This method makes a strong, espresso-like cup best suited to milk, not black sipping.
Cold brew: low-acid, make-ahead concentrate
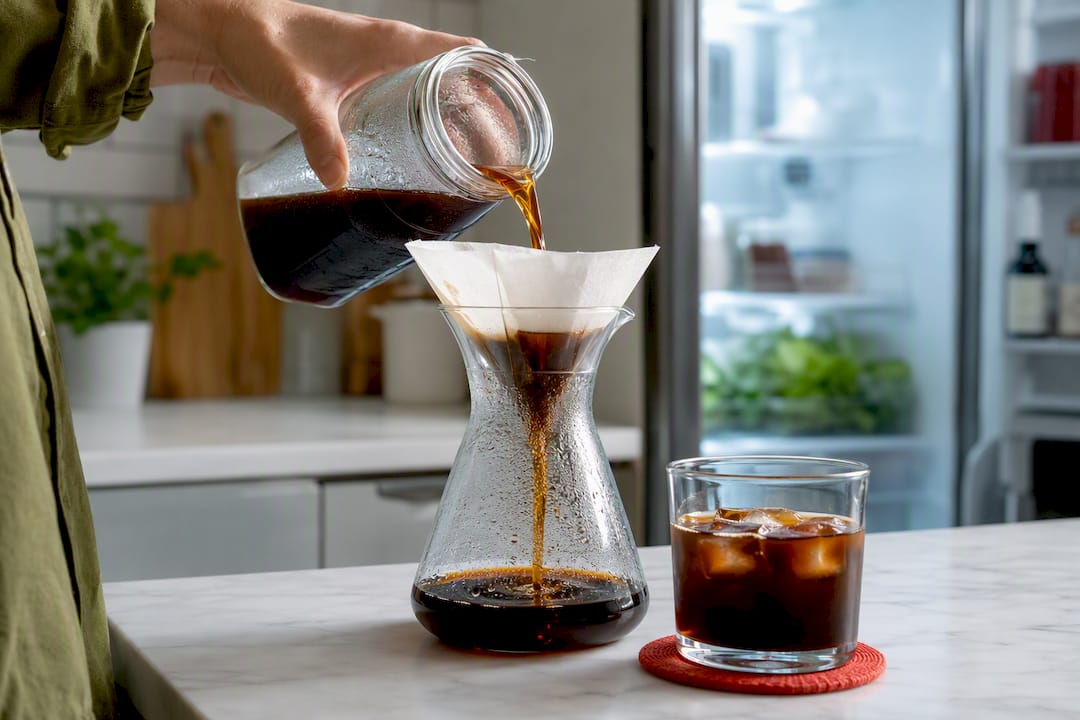
Cold brew trades speed for smoothness. The long, cold steep pulls flavor without the acids and oils that heat extracts quickly, which is why the finished coffee tastes noticeably gentler on the stomach.
For a concentrate you’ll dilute later, use a 1:8 ratio with a coarse grind, steeped 12 to 18 hours in the fridge. For something closer to ready-to-drink strength, go 1:14 instead. Strain through a mesh filter first to catch the bulk of the grounds, then through a paper filter or cheesecloth for a clear finish. Dilute concentrate roughly 1:1 with water or milk before serving, and store the strained batch in the fridge for up to two weeks.
How to choose and dial in a home brewing method
Match the method to what your morning actually looks like, not what looks impressive on a shelf. Need five minutes and cleanup with one hand? Aeropress. Want a slow ritual and bright flavor? Pour-over. Feeding four people before 8 AM? Drip. Want the fullest body possible? French press. Building milk drinks? Moka pot or espresso. Want tomorrow’s coffee ready today? Cold brew.
Once you’ve picked a method, dial it in with a simple, repeatable process:
- Weigh your coffee and water instead of eyeballing it.
- Set your grind size based on the method (coarse for immersion, fine for pressure).
- Check your water temperature, ideally 195°F to 205°F for hot methods.
- Time the brew and taste it.
- Change exactly one variable before your next cup.
That last step matters more than people think. Grind size is the single most impactful variable in fixing a bad cup, so it’s usually the first thing to adjust. A sour, thin cup usually means under-extraction: grind finer or extend contact time. A bitter, harsh cup usually means over-extraction: grind coarser or cut brew time.
Pro Tip: Keep two go-to methods instead of one, a fast one for weekdays and a slow one for weekends, and log the ratio, grind, and time for each. A five-second note in your phone saves you from repeating the same mistake for a month.
Essential kit and affordable upgrades
Buy in this order, because each purchase fixes a bigger problem than the last:
- Digital scale — removes guesswork from ratios; the cheapest fix with the biggest payoff.
- Burr grinder — produces even particle size, which blade grinders can’t match, and directly improves extraction.
- Gooseneck kettle — only necessary for pour-over, but it turns a wobbly pour into a controlled one.
- Quality filters — paper filters for clarity, metal for more body and oil retention.
A $30 grinder upgrade will improve your coffee more than a $150 brewer upgrade, because inconsistent grind size undermines every other variable you try to control. Once your kit is set, maintenance keeps it performing: clean grinder burrs monthly, descale kettles and drip machines every few months depending on your water hardness, and replace worn gaskets on moka pots and Aeropress seals when they stop sealing tightly.
Choosing beans and roast level for each method
Roast level changes how forgiving a method is, and pairing the wrong roast with the wrong brewer is a common reason a “correct” recipe still tastes off.
Light and medium roasts hold onto more acidity and origin character, which is exactly what pour-over is built to showcase. A washed Ethiopian or Kenyan light roast through a pour-over cone will show floral or citrus notes that get buried in a French press. Medium roasts are the safest all-around choice for drip machines and Aeropress, striking a balance between brightness and body that tolerates small timing or temperature errors.
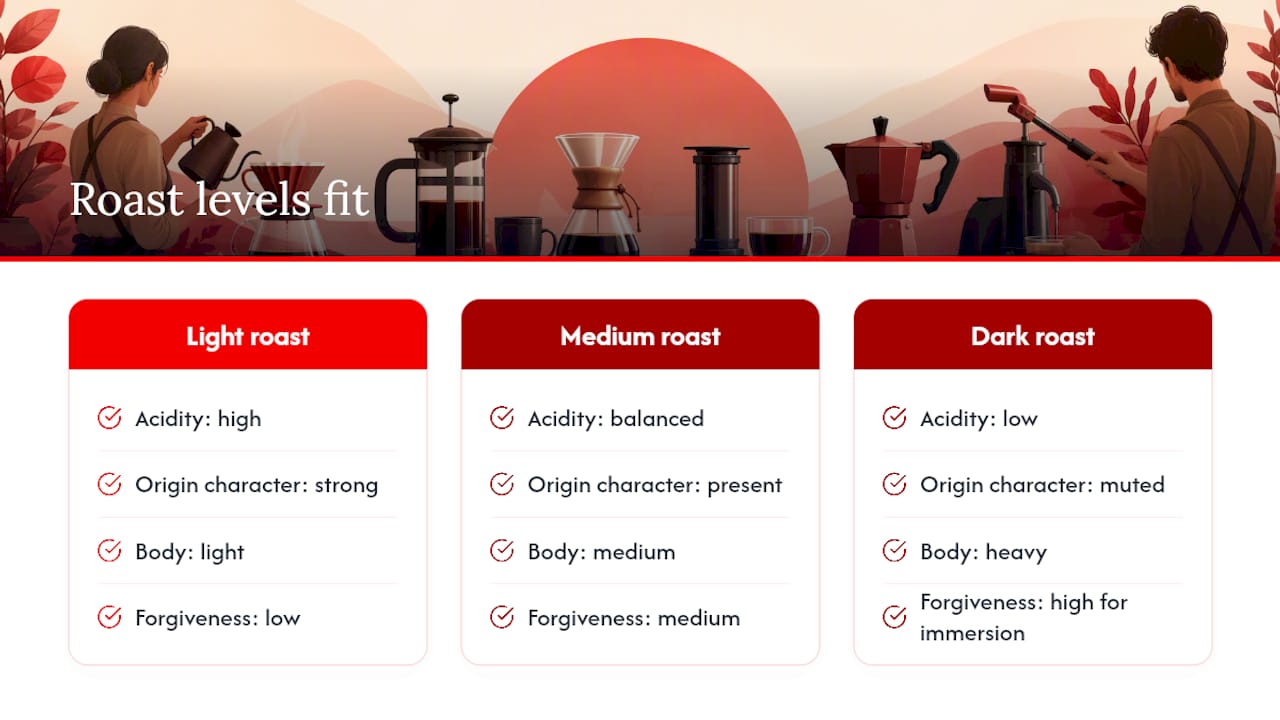
Darker roasts bring lower acidity and heavier body, which suits French press and moka pot particularly well. The oils darker beans release complement the moka pot’s already intense, concentrated style, and French press immersion pulls out that heavier body without over-emphasizing bitterness. For cold brew, medium to dark roasts tend to produce a smoother, chocolatey concentrate, since the long cold steep already softens acidity regardless of roast.
Freshness matters more than roast level for every method. Beans peak in flavor within two to four weeks of the roast date, and grinding right before brewing preserves aromatics that stale, pre-ground coffee has already lost. If you’re experimenting with different origins, our guide to six types of coffee worth trying is a good place to find a new bean pairing for whichever method you’re testing next.
Troubleshooting beyond basic extraction
Some brewing problems have nothing to do with grind size or ratio. They come from technique details that recipes rarely spell out.
Channeling is the biggest hidden flaw in espresso and, to a lesser degree, Aeropress. It happens when water finds an easy path through the puck instead of flowing evenly, usually from uneven tamping or a lopsided grind bed. The fix is distributing grounds evenly before tamping and tamping level, not hard. A cracked, uneven puck after brewing is the tell.
Bloom timing trips up pour-over brewers constantly. Skipping the bloom, or rushing through it, leaves trapped carbon dioxide in the grounds that pushes water around instead of through them, causing uneven extraction. Give fresh beans a full 30 to 45 second bloom with just enough water to saturate the grounds, then continue pouring in slow, steady circles.
French press sediment is often a straining problem, not a grind problem. Plunge slowly rather than forcing it, and pour immediately instead of letting the plunged coffee sit on top of the grounds. Moka pot sputtering that turns violent, rather than a gentle final hiss, usually means the heat is too high. Lower it and expect a slightly longer brew time in exchange for a cleaner cup. Cold brew that tastes weak despite a long steep is almost always a filtration issue: grounds that weren’t fully saturated at the start leave pockets of unextracted coffee that a longer steep won’t fix.
Storage tips that protect flavor consistency
Coffee starts losing aroma the moment it’s ground, and whole beans stored badly can lose their edge in days rather than weeks. Keep beans in an airtight, opaque container away from heat and sunlight, and resist the urge to store them in the fridge or freezer for daily use. The condensation from repeated temperature swings introduces moisture that dulls flavor faster than room-temperature storage does.
Buy beans in amounts you’ll use within two to four weeks, and grind only what you need right before brewing. Pre-ground coffee has roughly ten times the surface area of whole beans, so it stales dramatically faster.
Water matters just as much as beans. Tap water heavy in chlorine or minerals will flatten flavor no matter how good your beans are, so filtered water is worth the minor extra effort, particularly for pour-over and cold brew where water makes up more than 98% of the final cup. Store filtered water in a clean, covered pitcher rather than leaving it exposed, and clean your kettle regularly to prevent mineral buildup that changes how evenly it heats.
Our team’s take: keep it playful, experiment, and log
The fastest way to better coffee is not necessarily buying more gear, but running small, deliberate tests and writing down what happened. Change one variable, taste the result, and keep a simple log instead of trusting memory. Pick one fast method and one slow method so you’re never stuck choosing between good coffee and having time for it. And if you’re still exploring which beans excite your palate, a breakdown of six coffee types worth trying is a fun place to start.
— Alexander
Sources
- Brewing – NCA – About Coffee
- Why grind size matters — coffee extraction
- How to Brew Coffee at Home: A Complete Guide
FAQ
What is the best method to make coffee at home?
There’s no single best method, only the best fit for your routine. Pour-over suits patience and clarity, French press suits body, Aeropress suits speed, and most starter recipes begin around a 1:16 coffee-to-water ratio regardless of which one you choose.
What is the 15-15-15 rule for coffee?
It’s an informal pour-over guideline suggesting roughly 15 grams of coffee, brewed with water around 15 times that weight, finished in close to 15 seconds per pour segment. It’s a rough starting shortcut, not a fixed standard. Adjust grind and timing to your own taste.
What are the four best coffee brewing methods for beginners?
Pour-over, French press, Aeropress, and drip machines are the four most beginner-friendly methods, since each uses inexpensive gear and a short list of variables to control. Starting with one fast method and one slow method, as outlined earlier, helps beginners learn faster without feeling overwhelmed.
What is the 80/20 rule for coffee?
There’s no universally recognized rule specific to coffee brewing like the “80/20 rule”; definitions vary depending on the source. If you’ve seen it applied to extraction, it likely refers to the idea that a few key brewing variables, mainly grind size and ratio, drive most of the flavor outcome.
















Leave a Comment
Your email address will not be published. Required fields are marked with *