
Streamline your home improvement workflow in 7 strategic steps. Cut costs, avoid delays, and finish your projects successfully!
Managing a home improvement project without a clear structure is like building a house without a blueprint. You end up circling back, spending money you didn’t plan for, and watching simple projects stretch across weeks or months. A solid home improvement workflow changes all of that. It gives you a repeatable structure you can trust, whether you’re tackling a bathroom refresh or a full kitchen remodel. This guide walks you through every phase, from preparation to final walkthrough, so your next project runs smoother, costs less, and actually gets finished.
Table of Contents
- Key takeaways
- Building a strong home improvement workflow
- Executing your project in the right order
- Avoiding the most costly pitfalls
- Closing out your project the right way
- My take on what actually makes projects succeed
- Ready to take your next home upgrade further?
- FAQ
Key takeaways
| Point | Details |
|---|---|
| Plan before you build | A 4-phase project cycle prevents the most common delays and costly rework. |
| Sequence matters deeply | Rough-ins must come before drywall; getting this wrong can double your labor costs. |
| Permits protect your investment | Permit approval can take 2 to 8 weeks, so submit early to avoid timeline disruptions. |
| Scope freeze saves money | 35% of renovations go over budget due to sequencing errors and undefined scope. |
| Punch lists close the loop | A documented punch list with photos ensures nothing slips through before final payment. |
Building a strong home improvement workflow
Before a single tool touches your walls, the work you do on paper determines how your project plays out in real life. Skipping this phase is where most homeowners lose money and momentum. A strong home improvement workflow starts with thorough preparation, and there is a specific order to getting that right.
Define your scope clearly
Your first move is to write down exactly what you want done. Not a rough idea. A precise, detailed scope that covers every room, every finish, and every trade involved. This is called a scope freeze, and it is one of the most powerful things you can do before a project begins. Once you lock in the scope, you stop the constant mid-project additions that inflate costs and delay completion.
Think of it this way: adding a single electrical outlet after drywall is up can cost four times what it would have during the rough-in phase. Clear goals up front keep those surprises away.
Secure permits before you schedule anything
Permit approval can take 2 to 8 weeks depending on your city or county. That timeline catches most homeowners off guard because they submit for permits after they’ve already lined up contractors and set a start date. Submit your permit applications as early as possible, before you finalize your contractor schedule.
Pro Tip: Ask your contractor or local building department which inspections are required and when. Some jurisdictions require inspections at multiple stages, not just at the end.
Set your budget with room to breathe
A realistic budget includes the project cost plus a contingency buffer of 10 to 20 percent. That buffer is not pessimism. It accounts for the reality that walls sometimes hide surprises: outdated wiring, water damage, or undersized framing. Knowing your ceiling before work starts lets you make smart decisions in the moment rather than panic decisions.

Here is a quick-reference overview of what you need in hand before day one:
| Category | What to prepare |
|---|---|
| Documents | Permits, contracts, design drawings, scope of work |
| Budget | Itemized cost sheet, contingency fund, payment schedule |
| Materials | Lead time confirmed, delivery dates scheduled |
| Team | Contractor bids compared, references checked, licenses verified |
| Tools | Specialty tools rented or purchased, safety gear ready |
Vet your contractors properly
Get at least three bids for any major work. Compare them line by line, not just by the total price. A low bid that skips inspections or uses inferior materials will cost you more in corrections later. Check licenses, insurance, and references. Ask specifically about their experience with the type of project you’re running.
- Verify contractor license with your state licensing board
- Confirm general liability and workers’ compensation insurance
- Request references from projects completed in the last 12 months
- Ask for a written timeline with milestone dates built in
- Get all payment terms in writing before signing
Pro Tip: The best home improvement tips from experienced homeowners consistently point to one thing: vet your team before the project starts, not during.
Executing your project in the right order
Once preparation is complete, execution becomes a matter of following the sequence. This is where most DIY projects and even professionally managed renovations go wrong. The order of operations in a renovation is not arbitrary. Each phase creates the foundation for the next, and reversing that order creates expensive problems.
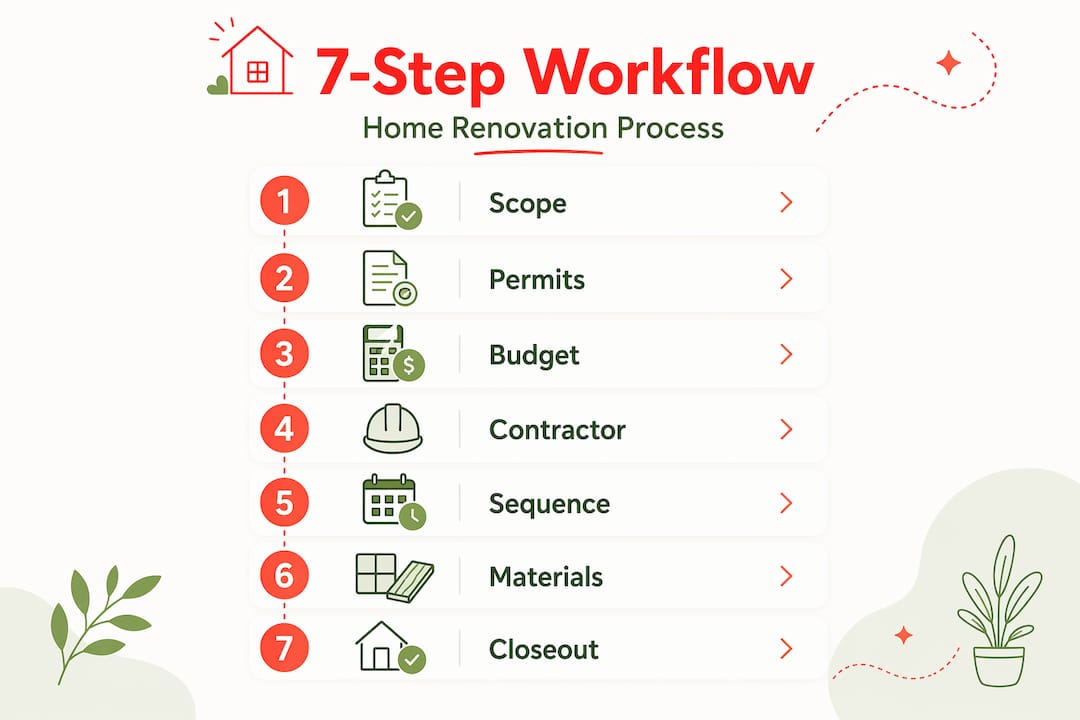
A practical home improvement workflow follows a 4-phase project cycle: planning, bidding, execution, and closeout. Within the execution phase, the internal sequence is what separates efficient renovations from chaotic ones.
The right sequence for renovation phases
- Demolition. Remove what is being replaced. Protect areas that are staying. Clear debris before new work begins.
- Structural work. Address any framing, load-bearing modifications, or foundation repairs. Everything else builds on top of this.
- Rough-in mechanical work. This covers plumbing, electrical, and HVAC. These systems run inside your walls and ceilings, so they must be in place before anything gets covered.
- Rough-in inspection. A building inspector reviews all mechanical work while it is still visible. This step is non-negotiable. Failing inspections after drywall means tearing open walls, which doubles your labor cost and your timeline.
- Insulation. Goes in after rough-in approval.
- Drywall. Hung, taped, mudded, and sanded. The walls now look like walls.
- Primer and paint. Applied before flooring to avoid drips on finished surfaces.
- Flooring. Installed after paint so no foot traffic damages the finish and no adhesive fumes affect other trades working in the space.
- Cabinetry and built-ins. Set once floors are protected or complete.
- Countertops and tile. Templated and installed after cabinets are set in their final position.
- Fixtures, appliances, and hardware. The finishing touches that complete each trade’s work.
- Punch list and final inspection. Review everything before sign-off.
A kitchen remodel is a perfect example of why this sequence matters. Plumbing rough-in must precede drywall, then paint, flooring, cabinetry, countertops, fixtures, and appliances. Skipping ahead even one step in that chain creates rework that costs real money.
Traditional vs. optimized sequencing
| Phase | Traditional approach | Optimized approach |
|---|---|---|
| Permits | Applied for at project start | Applied 4 to 8 weeks before construction |
| Rough-in inspection | Scheduled when contractor remembers | Scheduled during pre-construction planning |
| Material orders | Ordered as needed | Ordered with lead times calculated in advance |
| Change requests | Handled verbally during build | Documented with cost and timeline impact |
| Final walkthrough | Quick visual review | Formal punch list with photographic evidence |
Managing materials and lead times
Material delays are the silent project killer. Custom windows, specialty tile, and certain cabinets can have lead times of several weeks to several months. Order these items during pre-construction, not after demolition begins. Track your delivery dates on a simple spreadsheet or a free project management app. When materials arrive, inspect them immediately. Damaged or incorrect items ordered late will stall your project at the worst possible moment.
Pro Tip: For your DIY project workflow, use a shared cloud folder for all invoices, delivery confirmations, and change orders. It takes five minutes to set up and saves hours of confusion later.
Avoiding the most costly pitfalls
Even with a solid plan and the right sequence, projects run into turbulence. Knowing where the common problems hide lets you see them coming and steer around them before they become expensive.
Scope creep is the single biggest threat to your timeline and budget. It starts innocently. You’re already updating the kitchen, so why not add a new pantry? Each small addition feels minor in isolation, but together they compound into weeks of extra work and thousands of extra dollars. Lock your scope before you start, and treat any change as a formal decision with a documented cost and timeline impact.
Here are the most common mistakes in home improvement projects and how to sidestep them:
- Drywalling before inspection approval. The inspector needs to see your rough-ins. If you cover them first, you risk tearing everything open. Always wait for the green light.
- Ordering materials too late. Custom and specialty items need lead time. Build that into your pre-construction calendar, not your active construction schedule.
- Skipping written change orders. Verbal agreements disappear. A formal change-order process documents every addition, its cost, and its effect on the schedule. This protects both you and your contractor.
- Underestimating permit timelines. Waiting until after contractor mobilization to submit permits can freeze your entire project for weeks.
- Ignoring progress tracking. Without milestone check-ins, small delays stack up invisibly until they become a major problem.
Tools that keep your workflow on track
You don’t need expensive software to manage a home renovation. Free and low-cost tools work beautifully for most residential projects. A shared Google Drive folder handles documents and photos. Google Sheets handles schedules, budgets, and material logs. For more visual management, apps like Trello or Asana let you create task boards that mirror your project phases.
Platforms that combine visual measurement and estimating with proposals are also gaining traction in 2026, replacing the need for multiple disconnected apps. Whether you go high-tech or keep it simple, the key is consistency. Use whatever tool you will actually update every day.
Pro Tip: Cloud-based tools standardize project data and reduce miscommunication between trades. Even a basic shared folder cuts down on “I didn’t know” moments that stall progress.
Closing out your project the right way
The closeout phase is where many homeowners get impatient and let things slide. You’re exhausted, the space looks almost done, and you just want to enjoy it. But a sloppy closeout leaves money on the table and problems that surface months later.
A full home renovation typically spends 1 to 3 weeks in final closeout. Use that time well.
- Create a punch list. Walk through every space with your contractor and list every item that is incomplete, damaged, or not meeting spec. Be thorough. This is not the moment to be polite.
- Photograph everything. Take timestamped photos of every punch list item. This creates a clear, undeniable record that protects you if disputes arise over what was agreed.
- Verify all change orders are resolved. Every verbal and written change request should be accounted for in the final invoice. Compare it line by line against your change order log.
- Collect all documentation. Gather warranties for appliances, fixtures, and materials. Collect operation manuals. Get copies of all final inspection approvals and permit closeout documents.
- Schedule your final inspection. Some jurisdictions require a certificate of occupancy or a final building inspection before a space can be legally occupied or sold.
After closeout, spend 30 minutes creating a maintenance calendar. Note when filters need replacing, when sealants should be refreshed, and when mechanical systems need service. That small step protects the value of everything you just invested in.
My take on what actually makes projects succeed
Over many years of observing and writing about home renovation projects, I’ve noticed that the single most overlooked step is the scope freeze. Not the permits. Not the contractor vetting. The scope freeze. Homeowners will spend weeks picking tile samples and zero time writing a locked scope document. Then halfway through construction, new ideas emerge, budgets balloon, and suddenly a 10-week project becomes a 6-month ordeal.
I’ve seen sequencing errors cost homeowners more than they spent on the entire original contract. One real scenario: a bathroom renovation where drywall was applied before the plumber finished his rough-ins. The inspector flagged it, the wall had to come out, and the homeowner paid for drywall installation twice. That single error cost more than $3,000 and two weeks of schedule.
What I’ve learned is that emotions drive most bad renovation decisions. You get excited about the finished vision and want to move fast. Speed feels like progress. But in a remodel, speed at the wrong moment is the most expensive mistake you can make. Waiting one extra day for an inspection or spending one extra hour documenting a change order pays for itself many times over.
My strong advice: treat your renovation like a project manager would. Separate the emotional excitement of the transformation from the disciplined process of getting there. Use visual tools, document everything, and trust the sequence. The reward at the end is so much sweeter when you arrive there without financial stress or rework hanging over you.
— Alexander
Ready to take your next home upgrade further?
Once your workflow is in order, the real fun begins: choosing the upgrades that genuinely transform how your home looks and feels. Whether you’re thinking about comfort-focused renovations or smarter technology integrations, there’s a world of possibilities waiting. Explore the top home upgrades that boost both comfort and resale value, from energy-efficient systems to bathroom makeovers that feel like a spa retreat. If you want to layer in technology that works with your new space, the guide to [home improvement tech ideas](https://www.lizardslunch.com/best-home-improvement-tech-ideas-to transform-your-space/) covers smart solutions that complement any renovation. And when the project wraps up, discover how smart home gadgets can make everyday life easier in your beautifully upgraded space.
FAQ
What is a home improvement workflow?
A home improvement workflow is a structured sequence of phases, including planning, permitting, execution, and closeout, that guides a renovation project from start to finish. Following this structure prevents costly rework, missed inspections, and budget overruns.
Why does the order of renovation steps matter?
The order matters because each phase depends on the one before it. Rough-in plumbing and electrical must be inspected before drywall goes up; doing it out of order means tearing out finished surfaces and paying for labor twice.
How long does a typical home renovation take?
Timelines vary by scope. Pre-construction typically runs 4 to 12 weeks, active construction runs 2 to 12 months, and final closeout takes 1 to 3 weeks, based on a 19-step full renovation framework.
What is a scope freeze and why does it matter?
A scope freeze locks your project requirements before construction begins. Since 35% of renovations go over budget due to sequencing errors and scope changes, freezing your scope early is one of the most effective ways to protect your budget and timeline.
What should a renovation punch list include?
A punch list should catalog every incomplete, damaged, or out-of-spec item in each space, supported by timestamped photos. It also verifies that all change orders are resolved and that warranties, manuals, and final inspection approvals are collected before releasing final payment.


















Leave a Comment
Your email address will not be published. Required fields are marked with *