
Follow Lizard’s Lunch buy order for beginner woodworking tools in Canada, with power-first and hand-first starter kits, $1,000–$1,400 sample budgets, and…
Start with seven categories: a tape measure and combination square, a cordless drill, a circular saw, six to ten clamps, a random orbit sander, and a basic sharpening kit. A realistic starter budget runs from a few hundred dollars on the low end to over a thousand for a fuller power tool setup, and the smartest first purchase is your layout tools, since every cut depends on an accurate mark.
TL;DR:
- A tape measure, combination square, and marking knife cost under $60 and ensure accuracy for every cut and joint.
- Starting with a cordless drill, circular saw, and clamps for about $1,000 to $1,400 covers most beginner projects without a stationary saw.
- Beginners should defer to a table saw, jointer, or planer until they have more space, experience, and finish enough projects to justify the investment.
- Building a safety routine includes always wearing eye and hearing protection, keeping blades sharp, and inspecting cords and batteries before use.
- Softwoods like pine and cedar are ideal for practice, while hardwoods demand sharper blades and more clamping for quality results.
Table of Contents
- Essential woodworking tools checklist: what each one does
- Starter kits, purchase order, and sample budgets
- Choosing a battery platform and cordless tradeoffs
- Safety expectations and maintenance basics
- Tools to postpone and common beginner mistakes
- Our team’s perspective on building a beginner kit
- Types of wood and materials compatible with beginner tools
- Storage and organization for a growing tool collection
- A short note from our team
- Partnering with Lizard’s Lunch
- FAQ
- Sources
Essential woodworking tools checklist: what each one does
Every beginner woodworking kit starts with layout tools, and for good reason: a crooked cut traces back to a bad mark almost every time. A 25-foot tape measure, a combination square, and a marking knife cost under $60 together and set the accuracy ceiling for everything you build afterward. A marking knife beats a pencil for joinery work because it scores a fiber line the saw can actually follow.
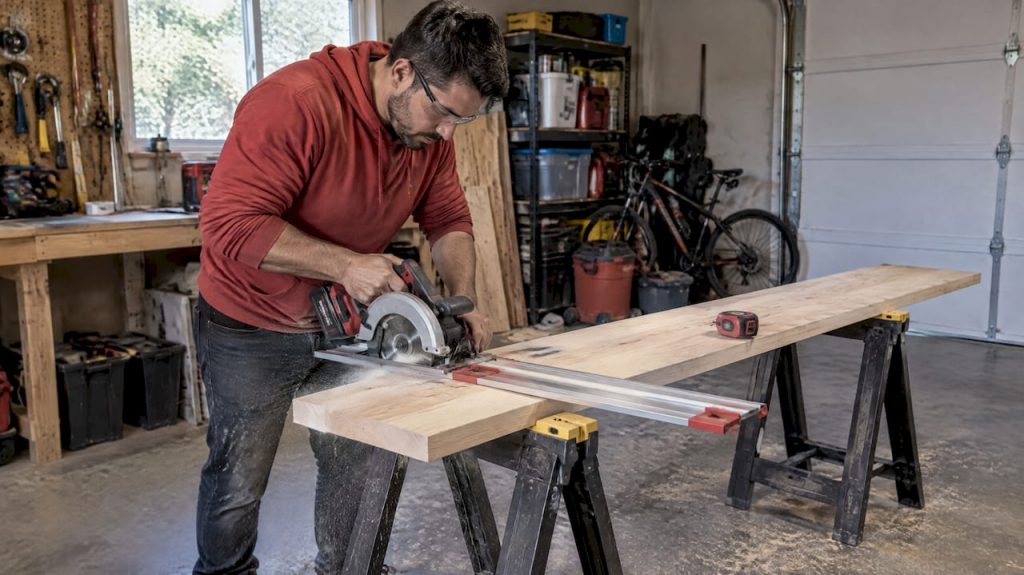
Cutting tools come next, and this is where beginners overthink it. A circular saw paired with a straightedge guide handles sheet goods and most crosscuts, while a jigsaw covers curves and cutouts a circular saw cannot touch. Hand saws, specifically a basic crosscut saw, are worth owning even if you go power tool first, because some cuts in tight spaces are faster by hand. The miter saw versus table saw question trips up a lot of new woodworkers: a miter saw is built for crosscutting boards to length and is safer to learn on, while a table saw rips sheet goods and long boards but demands more space, more money, and more respect for the blade. Most people starting out are better served skipping the table saw for a year or two and leaning on a circular saw with a guide rail instead, a point backed by a beginner power-tool guide that treats the table saw as a later purchase rather than a day-one requirement.
A cordless drill and driver combo handles both drilling holes and driving screws, which covers most assembly work in a beginner shop. Look for a 1/2-inch chuck and buy a quality bit set rather than the cheapest one on the shelf, since stripped screw heads and wandering drill bits are two of the most common early frustrations.
Clamps feel unglamorous until you try to glue two boards without enough of them. Buy enough clamps before you buy a second saw: a mix of 12-inch and 24-inch bar clamps covers most small to mid-size projects, and running out of clamps mid-glue-up is a problem no amount of saw horsepower fixes.
A random orbit sander speeds up finishing work dramatically compared to sanding by hand, and it leaves a swirl-free surface when you move through grits in order, typically 80, then 120, then 220. Skipping grits leaves scratches that show up the moment you apply finish.
Sharpening rounds out the list, and it matters more than most beginners expect. A dull chisel or plane blade needs extra force to cut, and that extra force is exactly what causes slips. A combination stone, something in the 1000/8000 grit range, along with a honing guide, keeps edge tools safe and effective without a major investment.

Pro Tip: Buy one quality tool per category before duplicating anything, since a single sharp chisel outperforms three dull ones.
Starter kits, purchase order, and sample budgets
Two paths work for beginners, and the right one depends on whether you want to finish projects quickly or to build hand skills first.
A balanced, power-first starter kit built around six core tools, a cordless drill, circular saw, random orbit sander, jigsaw, clamps, and a sharpening kit, runs roughly $1,000 to $1,400 when the tools share a single battery platform, according to a first-shop kit guide that breaks down example pricing for new woodworkers. That range assumes mid-tier tools rather than top-of-line models, and it gets you through most furniture and shop-project builds without a stationary saw.
A hand-focused starter kit costs less and teaches grain direction and joinery earlier. Chisels, a No. 4 bench plane, a combination square, sharpening stones, and a modest set of clamps can be assembled for a few hundred dollars, a figure drawn from the same guide’s cost breakdown for a minimal hand-and-power mix. This route suits anyone short on space, budget, or patience for loud machinery, and it builds skills that carry over no matter which tools you add later.
A practical buy order spread across a few months keeps the cost manageable:
- Month one: tape measure, combination square, marking knife, and a basic sharpening stone.
- Month two: cordless drill and driver with a quality bit set.
- Month three: circular saw with a straightedge guide, plus six to eight clamps.
- Month four: random orbit sander and a jigsaw.
- Month five and beyond: additional clamps, a hand plane, and chisels as projects demand them.
Tools worth deferring until you have a few finished projects behind you:
- A table saw, which needs space, a dust collection plan, and real blade-safety awareness before it earns its keep.
- A jointer or planer, since lumberyards and home centers can dimension rough stock for a fee while you build other skills.
- A dedicated router table, which solves problems most beginners have not run into yet.
Choosing a battery platform and cordless tradeoffs
Committing to one cordless battery platform early saves money, since batteries and chargers are often the most expensive part of a tool purchase and reused packs make every additional tool cheaper. It also means one charger on the bench instead of three.
A few platforms dominate beginner recommendations for different reasons:
- DeWalt 20V MAX tools are widely stocked and cover an unusually broad range of woodworking and general-purpose tools, which matters once you start adding a sander or jigsaw to the same battery system.
- Makita tools tend to run lighter and more compact, which some beginners prefer for overhead or extended use.
- Bosch offers a middle ground of build quality and tool variety that fits well into a mixed home and shop toolkit.
- Heavier-torque platforms suit demanding drilling and fastening tasks, while value-focused platforms stretch a tighter budget across more tools.
Resale data on popular cordless drills, including the kind tracked for models like the Makita XPH12Z, shows that mid-tier cordless drills hold value reasonably well, which is worth knowing if you upgrade later. Corded tools still make sense for stationary shop setups, continuous high-demand cutting, or when the lower price matters more than portability, since a corded circular saw or sander typically costs less than its cordless equivalent.
Safety expectations and maintenance basics
Eye protection belongs on your face for every single cut, no exceptions, and hearing protection matters just as much once a circular saw or sander is running for an afternoon. A dust mask or a shop vacuum with HEPA filtration keeps fine sawdust out of your lungs, which matters more over a woodworking hobby’s lifetime than any single project.
Canadian safety guidance, summarized in the IHSA Construction Health and Safety Manual, calls for following manufacturer operating instructions, wearing eye protection during tool operations, and pulling any damaged tool out of service immediately. The same guidance places responsibility on supervisors and trainers to make sure anyone using a tool has been shown how to use it safely, a principle echoed in an instructor guide to manual and power tool safety that treats tool-specific training as a prerequisite rather than an afterthought.
A dull blade or chisel forces you to push harder, and that extra force is what causes slips and kickback, according to the same instructor guide on tool hazards. Keeping edges sharp is a safety habit as much as a quality one.
Maintenance priorities worth building into your routine:
- Sharpen chisels and plane blades before they feel dull, not after.
- Wipe down cast iron tool surfaces to prevent rust, especially in a humid shop or garage.
- Check cords, batteries, and guards for damage before each use.
Tools to postpone and common beginner mistakes
Table saws, jointers, planers, and premium router tables can all wait. They solve problems that only show up once you are ripping plywood regularly or running enough board feet through your shop to justify the space and cost.
Common early mistakes include buying a cheap combo kit instead of individual quality tools, skipping sharpening because it feels optional, and under-buying clamps while over-buying saws. Readiness for bigger machinery shows up as a pattern: you are finishing projects consistently, ripping sheet goods often enough that a circular saw feels slow, and you actually have the floor space to spare.
Our team’s perspective on building a beginner kit
We favor foundational skills and tool maintenance over early investment in stationary machinery, a stance that lines up with the purchase order above. When members of our team at Lizard’s Lunch started out, the order looked like layout tools, then a chisel, then a hand plane, clamps, a drill, and finally a circular saw, each one earning its spot by solving a problem the last tool could not. For organizing the result, our guide on organizing garage tools covers layout ideas that work well for a growing kit.
Types of wood and materials compatible with beginner tools
Softwoods like pine and cedar are forgiving for beginner tools since they cut and sand easily with a basic circular saw, drill, and sander, which makes them a sensible starting material before moving to denser stock. Hardwoods such as oak, maple, and walnut need sharper blades and more clamping pressure during glue-ups, and a dull blade struggles noticeably more in hardwood than in pine.
Plywood and MDF are common beginner materials because sheet goods are flat and consistent, but they dull blades faster than solid wood due to glue content, so a dedicated plywood-rated blade is worth the small upgrade. MDF also produces fine dust that makes a HEPA shop vacuum or a good dust mask worth using every time.
Beginners often find that starting with pine or poplar for practice joints, then moving to a mid-range hardwood for a first real project, builds confidence without wasting expensive material on mistakes. Matching the wood to the tool matters just as much as matching the tool to the project: a basic jigsaw blade struggles in thick hardwood, while the same blade handles pine or softwood plywood without issue.
Storage and organization for a growing tool collection
A small wall-mounted pegboard handles hand tools efficiently and keeps chisels, squares, and clamps visible, which matters more than it sounds since a buried tool is a tool you stop using. Clamps in particular take up more space than beginners expect, and a dedicated clamp rack near the workbench saves real time on glue-up day.
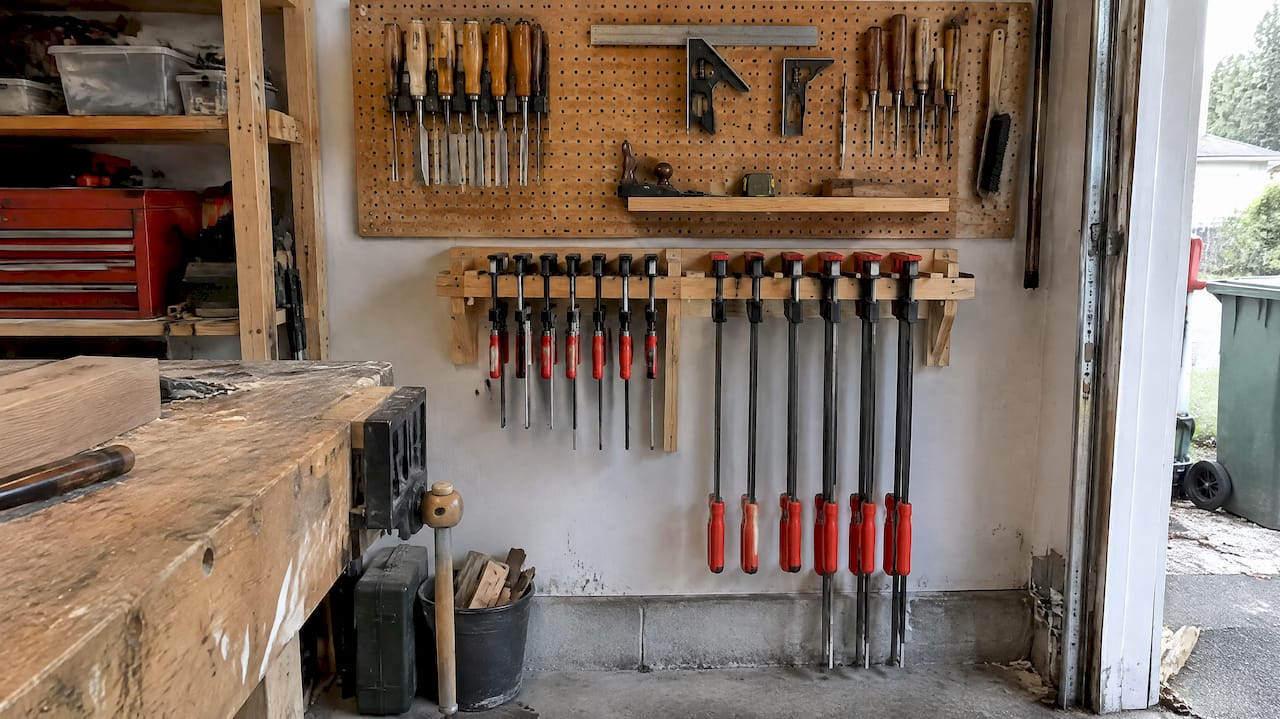
Cordless drill batteries and chargers do best on a shelf away from direct sunlight and extreme temperature swings, since heat shortens battery life. Sharpening stones and honing guides belong in a dry spot, ideally in a small box or drawer, since moisture affects stone performance over time.
For anyone working in a garage or shared space, our piece on organizing garage tools without wasting space covers layout strategies that apply directly to a beginner woodworking setup, and the space-saving ideas in our first apartment essentials guide translate well for anyone working with a small footprint.
A short note from our team
We started woodworking with a secondhand chisel and a single clamp, and the lesson stuck: finish one small project before buying the next tool.
— Alexander
Partnering with Lizard’s Lunch
We publish guides and reviews for beginners across home improvement, hobbies, and lifestyle topics, and work with brands and partners who want to reach that audience. If you have a product, service, or story that fits our readers, visit our advertise with us page to talk about guest posts or banner placements.
- We cover beginner-focused buying guides across multiple hobby and home categories.
- Partnership inquiries, including guest posts and banner ads, go through our advertise with us page.
FAQ
What are the best tools for a beginner woodworker to use?
A tape measure, combination square, cordless drill, circular saw, a set of six to ten clamps, and a random orbit sander cover most early projects. Adding a basic sharpening stone keeps chisels and plane blades safe and effective from the start.
What are the basic tools needed for woodworking?
The basics split into measuring and marking tools, a cutting tool like a circular saw or hand saw, a drill or driver, clamps for glue-ups, and a sanding tool for finishing. A sharpening kit rounds out the list since dull edges make every other tool less safe to use.
Can I teach myself woodworking?
Yes, many woodworkers learn through project-based practice, starting with simple builds using a small set of hand or power tools and adding skills as projects demand them. Following manufacturer instructions and basic safety guidance, such as the practices outlined in the IHSA safety manual, matters just as much as the building itself.
What are some easy DIY woodworking projects for beginners?
Simple shelves, a small step stool, a picture frame, and a basic workbench are common first projects that use only the core beginner tool list. Starting small lets you practice measuring, cutting, and clamping before taking on furniture with more complex joinery.
















Leave a Comment
Your email address will not be published. Required fields are marked with *