
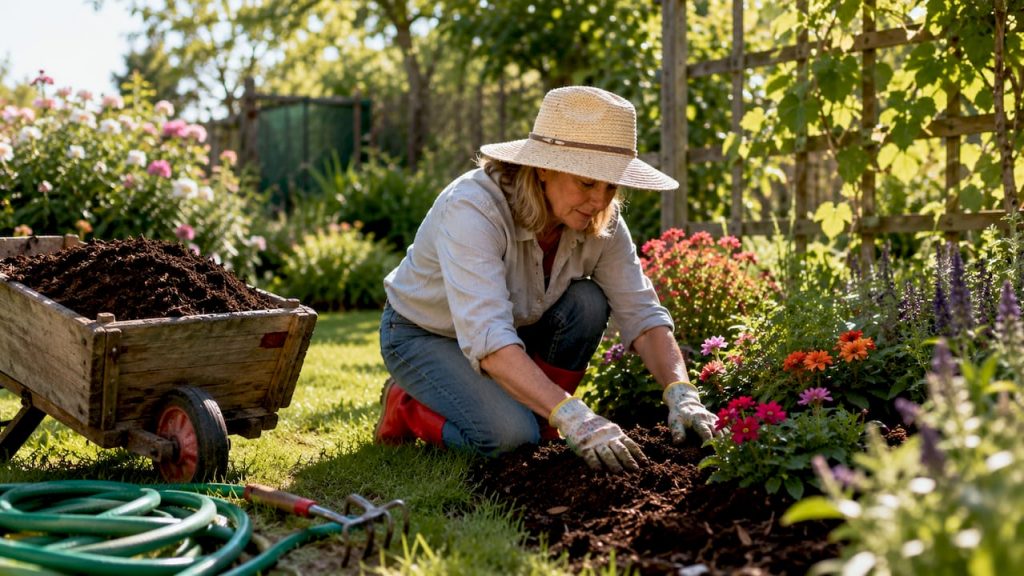
Discover effective garden improvement ideas to transform your outdoor space. From quick fixes to professional tips, elevate your garden today!
Garden improvement ideas are practical and creative enhancements that elevate the look, function, and enjoyment of your outdoor space. Whether you have a sprawling backyard or a compact urban plot, the right upgrades can turn a neglected patch of grass into something you genuinely love spending time in. The best approach to landscape enhancement starts with foundational tasks like fresh mulch and clean edging, then builds toward creative projects like layered planting, raised beds, and ambient lighting. This guide covers everything from beginner-friendly fixes to design principles used by professional landscapers, so you can make real progress at any skill level.
1. What foundational garden improvement ideas give the fastest results?
Fresh mulch is the single fastest upgrade you can make to any garden bed. A 2–3 inch layer of mulch suppresses weeds, retains soil moisture, and makes every bed look intentional and cared for. The material cost is low, and the visual payoff is immediate.
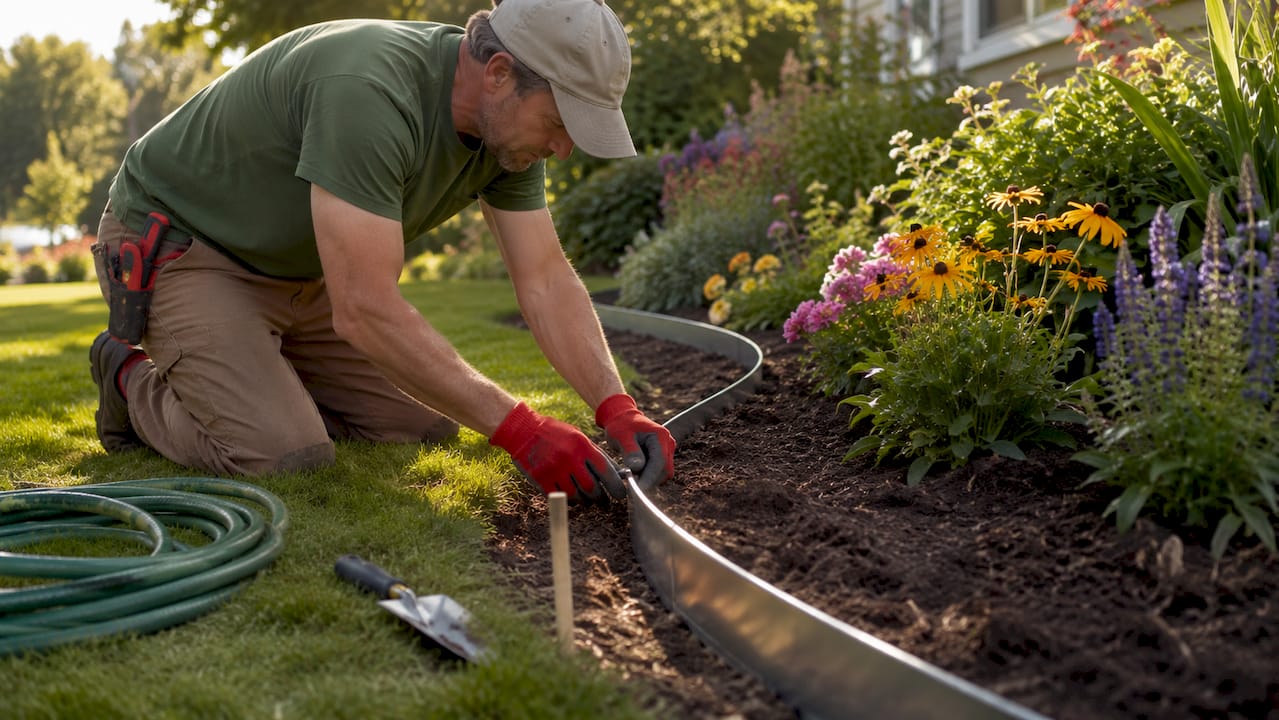
Clean edging is the second upgrade that professionals rely on. Crisp landscape edging with metal or plastic borders creates a clear line between your lawn and garden beds. Without it, grass creeps into beds and the whole yard looks unfinished, no matter how many flowers you plant.
Replacing struggling grass in shaded areas is another high-return move. Ground covers like hostas, pachysandra, or creeping Jenny thrive where turf fails. They fill space quickly, require minimal care, and give shaded corners a lush, intentional appearance.
A single statement shrub can anchor an entire planting area. Knockout roses deliver months of color with almost no maintenance. Boxwood provides year-round structure. Either choice gives your front yard a focal point that reads as deliberate design.
- Apply mulch in spring or fall for best weed suppression
- Use a half-moon edger or a flat spade for clean, straight lines
- Choose ground covers based on your light conditions, not just looks
- Plant statement shrubs in odd-numbered groupings for a natural feel
Pro Tip: Native perennials like coneflowers and black-eyed Susans return bigger each year and attract pollinators without staking, fertilizing, or heavy watering. Plant them once and enjoy long-term rewards.
2. How can layered planting and the 3-layer rule enhance your garden design?
The 3-layer rule is the primary secret behind professional-looking landscapes. Tall plants go in the back, medium shrubs in the middle, and low ground covers in the front. This arrangement creates depth and makes even a small bed look full and intentional.
The rule of three also applies to grouping. Odd-numbered plant groupings look more natural and harmonious to the human eye than even-numbered arrangements. Three ornamental grasses, five lavender plants, or seven creeping thyme plugs will always look better than two or four.
The 70/30 design principle keeps gardens from looking chaotic. Seventy percent of your planting should be a calm green foundation: shrubs, evergreens, and foliage plants. The remaining thirty percent is where you add seasonal color through flowering perennials or annuals. This balance prevents the “too many colors” problem that makes gardens feel busy.
| Layer | Plant type | Examples |
|---|---|---|
| Back (tall) | Trees, tall grasses, large shrubs | Arborvitae, ornamental grasses, viburnum |
| Middle (medium) | Flowering shrubs, mid-height perennials | Knockout rose, salvia, Russian sage |
| Front (low) | Ground covers, edging plants | Creeping thyme, pachysandra, sedum |
Spacing matters as much as selection. Overcrowding plants creates maintenance problems within two or three seasons. Check the mature spread of every plant before you buy it, and resist the urge to fill gaps immediately. Gaps close faster than you expect.
Pro Tip: For a unified garden palette, limit yourself to about three plant tones plus one neutral hardscape material. This creates a classy, cohesive look rather than a scattered one.
3. What creative garden projects add personality and functionality?
Raised garden beds are one of the most satisfying DIY garden improvements you can tackle on a weekend. Cedar lumber is the best choice because it resists rot naturally and looks beautiful without staining. Raised cedar beds cost between $80 and $150 to build and take about an afternoon to assemble. They give you full control over soil quality, which is especially valuable for kitchen gardens growing tomatoes, herbs, or salad greens.
Container gardens work beautifully on patios, balconies, and front steps. The “Thriller, Filler, Spiller” technique makes every pot look professionally designed. The thriller is a tall, dramatic plant like a spike or ornamental grass. The filler is a mounding plant like petunias or calibrachoa. The spiller trails over the edge, such as sweet potato vine or bacopa. Together, they create a full, layered look in a single container.
Pathways and defined zones transform a flat yard into a garden with rooms. Stepping stones create a natural walking path through planting areas. Gravel or decomposed granite defines patio zones without the cost of concrete. These materials are affordable, easy to install, and give your yard a sense of structure.
Privacy planting solves two problems at once. Fast-growing arborvitae hedges block sightlines from neighbors and create a green backdrop for other plantings. They grow up to three feet per year in good conditions and require almost no maintenance once established.
Lighting turns your garden into an evening destination. Outdoor lighting options like string lights, solar path lights, and lantern clusters each create a different mood. String lights strung between posts or along a fence create a warm, enchanted atmosphere. Solar path lights define walkways without any wiring. Lantern clusters grouped near a seating area feel cozy and inviting.
Water features add a sensory dimension that plants alone cannot provide. Solar-powered birdbaths and fountains cost between $30 and $80 and require no electrical wiring. The sound of moving water attracts birds and creates a calming backdrop that makes your garden feel like a true retreat.
4. How to implement smart maintenance and sustainability practices
The 3-hour rule is the most practical filter for plant selection. Choose plants that require no more than three hours of weekly hands-on care. If a plant needs constant deadheading, staking, spraying, or dividing, it will become a burden rather than a pleasure. Honest plant selection prevents garden neglect.
Soil preparation is the step most beginners skip, and it is the one that matters most. Adding 2–3 inches of compost into the top 8 inches of soil before planting can dramatically improve plant establishment and long-term health. Healthy soil grows healthy plants that resist pests and drought far better than plants struggling in poor ground.
Xeriscaping principles work in any climate, not just dry ones. Group plants with similar water needs together so you can water zones efficiently. Use inorganic mulches like gravel or crushed stone in hot, dry areas to reduce evaporation without the decomposition that organic mulch requires. These habits cut your watering time significantly over a full season.
- Group drought-tolerant plants like lavender, sedum, and ornamental grasses together
- Water deeply and infrequently to encourage deep root growth
- Prune shrubs right after flowering to promote healthy new growth
- Avoid planting shrubs within three feet of house foundations to maintain air circulation
Pro Tip: Limit your garden’s color palette to three plant tones plus one neutral hardscape material. This one decision alone makes a garden look designed rather than assembled.
5. How to plan your garden makeover for lasting success
Planning before planting saves money and prevents regret. Walk your yard at different times of day and note where sun falls, where water pools after rain, and which areas you actually use. These observations tell you where to invest and where to keep things simple.
Start with the areas that are most visible. Your front yard and the view from your main outdoor seating area deserve the most attention. Improving these zones first gives you the motivation to keep going. A fresh bed near your front door or a defined patio edge creates an immediate sense of progress.
Pace your projects across seasons. Tackle soil preparation and mulching in early spring. Add plants and raised beds through late spring and early summer. Install lighting and water features in summer when you are spending the most time outside. Save pruning and structural work for fall. This rhythm prevents overwhelm and keeps your garden improving year after year.
Budget realistically by prioritizing permanent improvements over seasonal ones. Metal edging, raised beds, and established shrubs deliver value for years. Annual flowers look beautiful but need replacing every season. Spend the bulk of your budget on structure and soil, then fill in with color as your budget allows.
6. Comparing affordable vs. high-impact garden upgrades
Not every upgrade costs the same, and not every expensive project delivers the most visible result. Understanding where your money goes furthest helps you make smarter choices, especially when working with a limited budget.
| Upgrade | Approximate cost | Visual impact | Maintenance level |
|---|---|---|---|
| Fresh mulch (per bed) | $40–$80 | Very high | Low |
| Metal landscape edging | $30–$60 | High | Very low |
| Raised cedar garden bed | $80–$150 | High | Low |
| Solar water feature | $30–$80 | Medium | Very low |
| Arborvitae privacy hedge (3 plants) | $90–$180 | High (long-term) | Low |
| String light installation | $25–$60 | Very high (evening) | Very low |
The most affordable upgrades, mulch and edging, also deliver the highest immediate visual return. That combination costs under $150 for a typical front yard and makes the entire property look more polished. Higher-cost projects like raised beds and privacy hedges pay off over multiple seasons.
Outdoor patio enhancements like furniture, lighting, and defined zones extend your living space outdoors. These upgrades work best after the garden itself has a clear structure. A beautiful seating area surrounded by overgrown beds still feels unfinished.
Key takeaways
The most effective garden improvement strategy starts with foundational tasks like mulch and edging, then layers in design principles and creative projects to build a space that looks professional and feels personal.
| Point | Details |
|---|---|
| Start with mulch and edging | These two upgrades cost under $150 and deliver the highest immediate visual return. |
| Apply the 3-layer rule | Place tall plants in back, medium in the middle, and low ground covers in front for depth. |
| Use the 70/30 principle | Keep 70% green foundation planting and 30% seasonal color to avoid visual chaos. |
| Follow the 3-hour rule | Only choose plants that require three hours or less of weekly care to prevent neglect. |
| Prepare soil before planting | Adding compost to the top 8 inches of soil dramatically improves plant establishment. |
What I have learned from years of watching gardens succeed and fail
The gardens that look the best five years after planting are almost never the ones with the most plants. They are the ones where someone spent real time on soil, edging, and plant selection before buying a single flower.
I see the same beginner mistake repeatedly. Someone gets excited, buys a car full of plants in may, and puts them all in the ground the same weekend. By july, the beds are overcrowded. By the following spring, half the plants are dead because the soil was never prepared. The excitement was real, but the planning was missing.
The 3-layer rule changed how I think about garden design entirely. Before I understood it, my beds looked flat no matter how many plants I added. Once I started placing tall plants at the back and working forward in layers, every bed started looking intentional. It is a simple principle, but it is the difference between a garden that looks planted and one that looks designed.
Fresh mulch is the upgrade I recommend to every homeowner before anything else. It is the garden equivalent of painting a room. The cost is low, the effort is manageable, and the result is dramatic. If your beds look tired and weedy, do not buy new plants. Buy mulch first.
The most fulfilling gardens are built in stages, not weekends. Celebrate the small wins: a freshly edged bed, a new birdbath, a raised bed full of herbs. Each improvement builds momentum and teaches you something about your specific yard. That knowledge is worth more than any plant catalog.
— Alexander
Ready to take your outdoor space further?
Your garden is just one part of a home that deserves to feel as good as it looks. At Lizardslunch, you will find guides that cover everything from home improvement tech ideas to outdoor living upgrades that complement every garden project you tackle. Whether you are planning a full backyard makeover or just looking for your next weekend project, the resources here help you make confident, informed decisions. Browse the DIY landscaping guides to go deeper on plant placement, design principles, and outdoor transformations that actually last.
FAQ
What are the easiest garden improvement ideas for beginners?
Applying fresh mulch and installing clean landscape edging are the two easiest and highest-impact upgrades for beginners. Both require minimal tools, cost under $150 combined, and produce immediate visual results.
How does the 3-layer rule work in garden design?
The 3-layer rule places tall plants at the back of a bed, medium shrubs in the middle, and low ground covers at the front. This arrangement creates depth and makes any planting area look professionally designed.
What plants require the least maintenance in a garden?
Native perennials like coneflowers, black-eyed Susans, and bee balm are among the lowest-maintenance choices. They return each year, attract pollinators, and require no staking or heavy fertilizing.
How much does it cost to build a raised garden bed?
A raised cedar garden bed typically costs between $80 and $150 in materials and takes about an afternoon to build. Cedar is the preferred lumber because it resists rot naturally without chemical treatment.
What is the 70/30 design principle in gardening?
The 70/30 principle recommends filling 70% of your planting space with calm green foundation plants like shrubs and evergreens, and reserving 30% for seasonal flowering plants. This balance prevents visual chaos and creates a cohesive, polished look.


















Leave a Comment
Your email address will not be published. Required fields are marked with *