

Learn how to budget for remodeling effectively with our step-by-step guide. Define your scope, create estimates, and secure bids to avoid surprises.
Build your remodel budget by defining scope and finish level first, then creating a line-item estimate, adding a contingency appropriate to your project’s complexity, and validating every number with three contractor bids. That sequence, recommended by Redfin and Fidelity, keeps you from chasing a price-per-square-foot target that has no relationship to what your specific project actually costs.
Here are three things you can do in the next 24–48 hours to get started:
- Walk every room in your project and write down exactly what changes and what stays.
- Choose your finish level (builder-grade, mid-range, or custom) before you look at a single price.
- Open a spreadsheet and create one row per cost category so you have a real budget shell waiting for numbers.
Pro Tip: Keep two separate contingency buckets from day one: one for unknowns discovered during demolition (mold, rot, outdated wiring) and one for upgrades you choose along the way. Mixing them is one of the most common reasons projects stall mid-construction.
Table of Contents
- How do you build a realistic remodel budget from scratch?
- What do typical remodels actually cost, and where does the money go?
- What soft costs and hidden expenses do you need to budget for?
- How should you pay for a remodel, and which funding option fits your situation?
- How do you compare contractor bids so you’re choosing value, not just the lowest price?
- How do you track spending and control costs once the remodel starts?
- What mistakes do experienced builders see most often, and how do you avoid them?
- Key Takeaways
How do you build a realistic remodel budget from scratch?
A defensible remodel budget is built in six ordered steps. Skipping ahead to pricing before you finish step one is the single most common cause of mid-project budget failure.

Step 1: Define scope and finish level
Write a room-by-room scope that lists every item being changed and every item staying put. A kitchen remodel might include new cabinets, countertops, appliances, and flooring but exclude the ceiling and windows. That boundary matters because every contractor will price what they assume is in scope, and vague assumptions become expensive change orders.
Finish level shapes cost as much as scope does. Builder-grade cabinets can cost a fraction of semi-custom, and semi-custom costs a fraction of fully custom. Decide before you price anything. For inspiration on how finish choices affect the feel of a space, the decorating tips for first-time buyers guide walks through practical finish decisions room by room.
Step 2: Build a line-item budget
Create one row per cost category. A solid starting framework looks like this:
- Demolition and disposal (labor, dumpster rental)
- Framing and structural (walls, beams, subfloor)
- Mechanical (plumbing, electrical, HVAC)
- Insulation and drywall
- Finishes (tile, flooring, paint)
- Fixtures and appliances
- Cabinetry and millwork
- Labor (broken out by trade where possible)
- Permits and inspections
- Design and engineering fees
- Contingency (two buckets: unknowns and upgrades)
Each row should have a budgeted amount, a quoted amount once bids arrive, and a paid-to-date column. That structure turns your budget into a live tracking tool.
Step 3: Check local cost benchmarks

Per-square-foot figures are useful for a quick sanity check, not a final budget. Local labor and material markets can shift pricing more than national trends, so check multiple local suppliers and contractor references rather than relying on a single online calculator. A range like $100–$300 per square foot for basic updates is a screening tool; your line-item estimate is the real number.
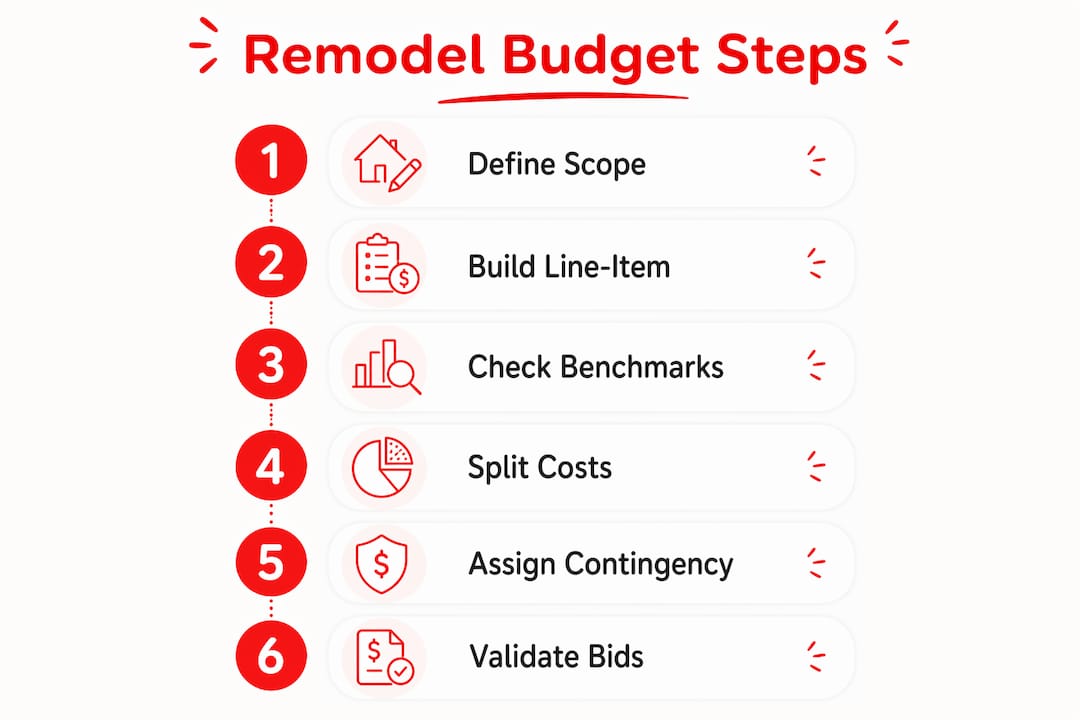
Step 4: Split labor and materials, then add soft costs
Ask each contractor to break their bid into labor and materials. That split lets you spot where costs are concentrated and where you might supply materials yourself to save money. Add soft costs as their own line items (see the full soft-costs section below).
Step 5: Assign contingency
For a straightforward cosmetic remodel in a newer home, 10% contingency is reasonable. For older homes, structural work, or projects involving mechanical systems, 15–20% is more appropriate. Separate those contingency funds into at least two buckets: one for condition-based unknowns and one for owner-selected upgrades. That separation protects you when demolition reveals a surprise.
Step 6: Validate with three bids
Send your scope-of-work document to at least three licensed contractors and ask each for a detailed, line-item response. Update your budget with the bid data before committing to any contractor. The step-by-step home renovation guide includes a downloadable workflow template you can adapt for small or large projects.
What do typical remodels actually cost, and where does the money go?
Realistic ranges vary widely by location, scope, and finish level. The numbers below are general guidance for U.S. projects; always validate against local benchmarks before finalizing your budget.
| Project type | Typical range | Notes |
|---|---|---|
| Minor kitchen refresh | — | Paint, hardware, appliances, countertops |
| Full kitchen remodel | — | New cabinets, layout changes, all finishes |
| Bathroom remodel | — | Varies sharply by size and fixture grade |
| Flooring (per room) | — | Depends on material and square footage |
| Interior paint (whole home) | — | Labor-heavy; DIY cuts cost significantly |
| Whole-home renovation | — | Scope and finish level drive the range |
Kitchen projects tend to deliver strong returns. Our kitchen renovation ROI guide covers the 70–80% return range homeowners typically see, which is useful context when deciding how much to invest.
How budget typically divides across cost categories
| Category | Approximate share of total budget |
|---|---|
| Materials and finishes | 30–40% |
| Labor | around 30% |
| Contractor overhead and markup | 10–15% |
| Permits, inspections, and fees | 2–5% |
| Contingency | 10–20% |
These splits shift based on project type. A tile-heavy bathroom skews toward materials; a structural addition skews toward labor and engineering.
Location moves these numbers more than most homeowners expect. Metropolitan areas carry higher labor and transport costs, so a mid-range kitchen remodel that costs $45,000 in a mid-size Midwestern city might run $70,000 or more in Los Angeles or New York. Per-square-foot figures are especially unreliable in high-cost markets where scope and finish level create enormous variation.
The 30% rule suggests spending no more than 30% of your home’s value on any single space. It is a useful ceiling for screening scope, but it does not replace a market-specific ROI analysis or a real line-item estimate.
Pro Tip: The three design choices that most acutely drive cost are layout changes (moving plumbing or load-bearing walls), custom cabinetry, and structural modifications. If your budget is tight, keep the layout, choose semi-custom cabinets, and spend the savings on high-visibility finishes.
What soft costs and hidden expenses do you need to budget for?
Soft costs are the non-material, non-labor expenses that rarely appear on a contractor’s bid but can add thousands to your total. Budget for them as line items from the start.
- Permits and plan review fees: These vary by jurisdiction and project type. Check your local building department’s website for the current fee schedule before you finalize your budget. Permit and inspection fees are variable but can materially affect small-to-medium projects.
- Inspections: Rough-in inspections, framing inspections, and final inspections each carry fees and can create schedule delays if they require rework.
- Design and architecture fees: A designer or architect typically charges either an hourly rate or a percentage of construction cost. Get a written fee agreement before the project starts.
- Engineering fees: Structural engineers are required for load-bearing wall removal, additions, and some foundation work.
- Temporary housing or storage: If the kitchen or a bathroom is out of commission, budget for meals out, a hotel, or a portable storage unit.
- Dumpster rental: A standard 10-yard dumpster typically runs $300–$500 per week depending on your market.
- Insurance adjustments: Notify your homeowner’s insurance carrier before major work begins. Some projects require a builder’s risk policy.
- Utility disconnects and reconnects: Electrical service upgrades, gas line work, and water shutoffs can each carry fees from the utility company.
- Asbestos or mold remediation: Homes built before 1980 may contain asbestos in flooring, insulation, or drywall compound. If demolition reveals mold or hazardous materials, remediation costs can run several thousand dollars and are exactly what your unknowns contingency is for.
- Code upgrades: Opening walls in an older home often triggers code-compliance requirements for electrical, plumbing, or egress that were not part of your original scope.
Early contact with your local building department clarifies permit requirements and typical approval timelines, which helps you align your budget and schedule before a contractor is ever on site.
How should you pay for a remodel, and which funding option fits your situation?
Choosing the right funding path depends on your project size, timeline, available equity, and comfort with monthly payments.
Common funding options
Cash or savings is the simplest path. No interest, no lender approval, and no monthly payment added to your household budget. The tradeoff is that it depletes liquid reserves, so keep enough in savings to cover your contingency before committing.
Home equity line of credit (HELOC) lets you draw funds as needed up to an approved limit, paying interest only on what you use. Rates are variable, so factor in potential rate increases over a multi-month project. A HELOC works well for phased projects where costs arrive in stages.
Cash-out refinance replaces your existing mortgage with a larger one and delivers the difference as cash. It can make sense when current rates are favorable, but it resets your mortgage term and adds closing costs.
Renovation loans such as the FHA 203(k) or Fannie Mae HomeStyle wrap purchase or refinance financing and renovation costs into a single loan. These products have specific eligibility requirements and require a HUD-approved consultant for the 203(k). They are worth exploring if you are buying a fixer-upper.
Personal loans are unsecured and fast to obtain, but interest rates are typically higher than home-equity products. Best suited for smaller projects under $20,000 where you want to avoid tapping home equity.
Credit cards carry the highest interest rates and are generally appropriate only for small purchases or as a short-term bridge when a 0% promotional period covers the project timeline.
Decision factors and practical steps
- Calculate the total cost of financing (interest plus fees) and add it to your project budget as a line item.
- Get pre-approved before you sign a contractor agreement so your financing timeline does not delay the project start.
- For financed projects, add an extra 5% to your contingency to account for the cost of carrying debt during construction delays.
- Consult a tax advisor about whether interest on home-equity products is deductible for your situation.
Questions to ask your lender before committing:
- What is the interest rate, and is it fixed or variable?
- What are the origination fees and closing costs?
- How long does approval and funding take?
- Are there draw restrictions or required inspections before funds are released?
- What happens to my payment if the project runs over budget?
For guidance on which projects deliver the strongest return on your investment, the home improvement ROI tips guide is a practical next read before you finalize your funding amount.
How do you compare contractor bids so you’re choosing value, not just the lowest price?
Three bids is the minimum. Fewer gives you no baseline; more becomes unmanageable. Require a detailed, line-item scope of work from each contractor that specifies materials, labor, allowances, exclusions, timeline, and payment schedule.
What every bid must include
- Contractor’s license number and proof of general liability and workers’ compensation insurance
- Detailed line-item scope of work with unit quantities and unit rates where applicable
- Material specifications (brand, model, grade) or explicit allowances with dollar amounts
- Payment schedule tied to milestones, not calendar dates
- Start date, substantial completion date, and punch-list completion date
- Warranty terms for labor and materials
- Change-order process in writing
Red flags to watch for
- A bid that is roughly 20% lower than the others. Very low bids frequently reflect underestimated complexity or a plan to recoup margin through change orders once work is underway.
- Vague scope descriptions like “kitchen remodel per plans” with no line items.
- A request for more than 10–15% upfront before work begins.
- Missing or expired insurance certificates.
- Refusal to provide references from projects completed in the last 12 months.
How to normalize bids for a true comparison
Convert every allowance to a fixed line item using the same product specification. If one contractor allows $3,000 for tile and another allows $5,000, the bids are not comparable until you apply the same tile selection to both. List every owner-supplied item explicitly so each contractor prices the same scope. When bids still vary widely after normalization, ask each contractor to walk you through their assumptions line by line. That conversation reveals who actually understands the project.
Pro Tip: Ask each contractor how they handle unforeseen conditions discovered during demolition. Their answer tells you more about their professionalism than their price does. A contractor who has a clear written process for change orders is protecting both of you.
How do you track spending and control costs once the remodel starts?
A budget built before construction is only useful if you update it throughout the project. Set a weekly rhythm: reconcile every contractor invoice against the line-item scope, log receipts for owner-purchased materials, and update your “committed” and “paid” columns before the next payment is due.
A simple tracking spreadsheet
Track these columns for every line item:
- Budgeted: your original estimate
- Quoted: the contracted amount from the bid
- Committed: approved change orders added to the quoted amount
- Paid to date: cumulative payments made
- Remaining: committed minus paid to date
That five-column structure gives you a real-time picture of where you stand without needing specialized software. Google Sheets or Microsoft Excel both work well. The home improvement workflow guide includes a practical template you can copy and adapt.
Change-order discipline
Every scope change, no matter how small, requires a written change order with a cost amount and a schedule impact before work begins. Verbal agreements during construction are where budgets quietly collapse. Set a simple approval rule: any change order above a threshold you choose (say, $500) requires your written sign-off before the contractor proceeds.
Cost-control tactics that experienced project owners use:
- Hold back 5–10% of each payment until the milestone is fully complete and inspected.
- Stage approvals for finish selections so you are not making expensive decisions under time pressure.
- Review the contractor’s material invoices before paying; confirm quantities match the scope.
- Track your contingency balance weekly so you know exactly how much buffer remains.
- Avoid scope additions during the first third of the project, when disruption to the schedule is most costly.
What mistakes do experienced builders see most often, and how do you avoid them?
The most expensive budgeting mistake is starting with a price target before defining scope. When you set a number first, you spend the entire project trying to fit your vision into a box that may not match reality. Experienced builders recommend defining scope and finish level first, then letting the estimate tell you what the project costs.
The second most common mistake is underfunding contingency. Homeowners often treat the contingency line as optional padding and cut it when the budget feels tight. Then demolition reveals outdated knob-and-tube wiring or a rotted subfloor, and the project stops. A contingency in the lower to mid-teens is not pessimism; it reflects the cost of working in an existing structure where conditions are unknown until walls open.
Choosing the lowest bid without normalizing the scope is the third pattern that reliably causes pain. A bid 20% below the field almost always means something is missing, either in the contractor’s understanding of the project or in their plan to make margin back through change orders.
Finally, ignoring local cost variation leads homeowners to budget based on national averages that may have no relationship to their market. Check local suppliers, pull recent permit records from your building department, and ask your contractor for references from comparable local projects.
Statistic callout: Separating contingency into two buckets (one for unknowns, one for upgrades) is one of the most practical structural improvements you can make to a remodel budget. It prevents the scenario where a $15,000 mold remediation surprise wipes out the fund you were holding for a kitchen upgrade.
Scheduling also affects cost in ways most homeowners overlook. Contractors are often busiest between September and the holidays and during spring. Scheduling your project for January through early March can improve both pricing and availability, though you should factor in potential weather delays for exterior work.
Pro Tip: Our team at Lizard’s Lunch recommends negotiating scope before negotiating price. If a contractor’s bid exceeds your budget, ask what can be phased to a later date rather than asking for a blanket discount. Phasing preserves quality; discounting often means cutting corners you will not see until after the warranty expires.
Key Takeaways
A realistic remodel budget starts with scope and finish level, not a price target, and stays accurate only when you track it actively throughout construction.
| Point | Details |
|---|---|
| Scope before price | Define what is in and out of the project before researching any cost figures. |
| Two contingency buckets | Separate funds for unknowns (mold, rot, code) from funds for owner-chosen upgrades. |
| Three bids, normalized | Require line-item bids from three contractors and reconcile allowances before comparing. |
| Local benchmarks first | Check local suppliers and permit records rather than relying on national calculators. |
| Track weekly | Update budgeted, quoted, committed, and paid columns every week to catch overruns early. |
A note from our team at Lizard’s Lunch
We put this guide together because the most stressful part of any remodel is not the construction itself. It is the feeling that costs are running away from you and you do not have a clear picture of where you stand. The step-by-step method here, scope first, line items second, bids third, gives you that picture before a single wall opens. We encourage you to adapt the budget template and tracking columns to your specific project, whether you are refreshing a single bathroom or taking on a whole-home renovation. For a deeper look at which projects deliver the strongest return and how to sequence them, the step-by-step renovation guide is a natural next step.
Useful sources and further reading
- How to create a home remodeling budget (Redfin) — Covers scope-first budgeting and finish-level decisions with practical homeowner guidance.
- Budgeting for home renovations and improvements (Fidelity) — Explains local benchmarking, permit costs, and how to factor financing into your total budget.
- Remodel budget guide (RemodelCalculators) — Detailed breakdown of contingency structure and how to separate unknowns from upgrade funds.
- How to save on renovation (RenovateCost) — Covers contractor timing, bid red flags, and how to normalize competing bids.
- The 30% rule in home renovation (JSB Home Solutions) — Explains the popular spending heuristic and its limitations in different markets.
- Home renovation cost guide (Budget Dumpster) — Practical planning advice including dumpster costs and disposal budgeting.
- How to renovate without costly mistakes (Lizardslunch) — Our team’s checklist for avoiding the most common renovation errors from planning through completion.
- Home renovation ideas that add character (Lizardslunch) — Inspiration for scope and finish decisions, with project ideas organized by room and budget level.
This article is general information for planning purposes, not professional financial, legal, or construction advice. Confirm current permit requirements, financing terms, and cost benchmarks with your local building department, a licensed contractor, and a qualified financial advisor for your specific situation.


















Leave a Comment
Your email address will not be published. Required fields are marked with *