
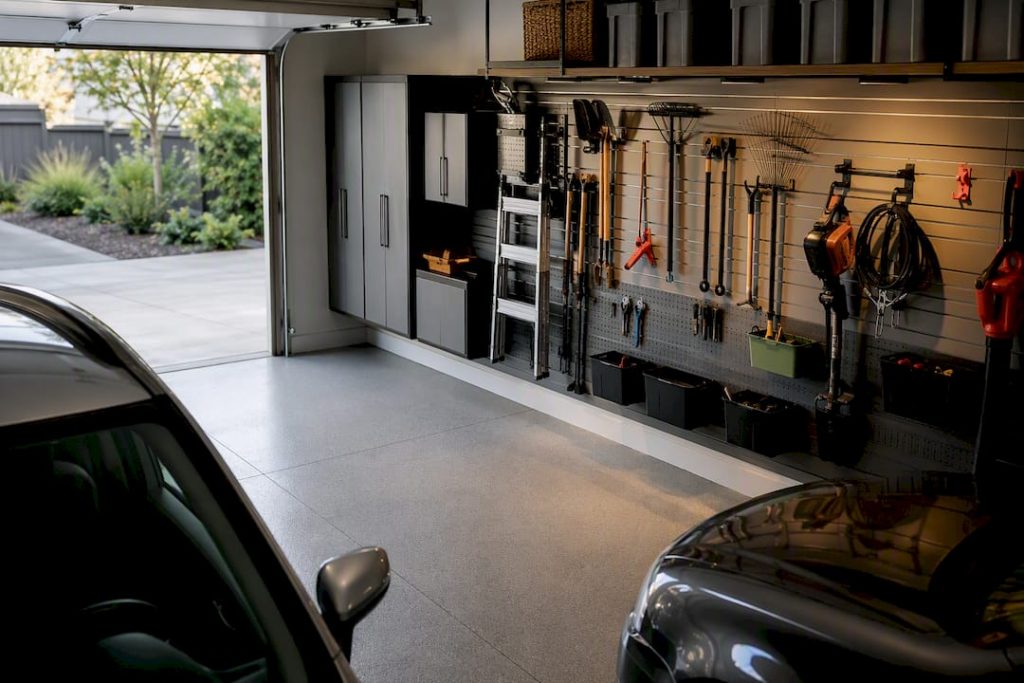
Declutter, zone, then install three systems — wall storage, overhead racks, and labeled bins. DIY-friendly, low-cost wins tested to free floor space fast.
Declutter first, then divide the space into zones, then install exactly three systems: wall storage, overhead racks, and labeled bins in modular cabinets. Skip the zoning step and you’ll buy the wrong bins twice. Get the sequence right, and even a cluttered two-car garage can hold a full workshop, seasonal gear, and both cars within a weekend or two. The checklist below breaks that sequence into moves you can start this weekend.
TL;DR:
- Properly matching wall storage systems to your gear, such as pegboard for small tools or French cleats for heavy equipment, prevents costly mistakes.
- Mount overhead racks into ceiling joists and reserve this space for seasonal or rarely used items to maximize storage without risking safety.
- Invest in load-bearing wall cleats and overhead racks first, then add bins and labels later to ensure a stable, long-lasting organization system.
- Use thick pegboard with locking hooks in high-weight areas and ensure all mounting screws go into studs or appropriate anchors for safety and durability.
- Complete the decluttering, zoning, and system installation within a weekend, but plan for several weekends to fully finish and fine-tune the garage setup.
Table of Contents
- 10 Highest-Impact Garage Organization Ideas
- Vertical Wall Storage: Pegboard, Slatwall, Rail, and French Cleat
- Ceiling and Overhead Storage: Best Practices and Safety
- Shelving and Cabinets: Freestanding, Wall-Mounted, and Modular Systems
- Tool, Workbench, and Small-Parts Organization
- Bins, Labels, and Visibility Systems
- Parking, Vehicle Access, and Bulky-Item Storage
- How to Keep a Garage Organized: The Habit That Actually Works
- Budget DIY Hacks and Quick Wins
- What Our Team Found Testing Garage Wall Systems
- Realistic Expectations for Your Garage Project
- Sources
10 Highest-Impact Garage Organization Ideas
Some of these take an afternoon. Others take a full Saturday. All ten belong on a real shortlist because they solve a specific, common problem.
- Declutter and zone first — sort everything into keep, donate, and toss before buying a single bin.
- Pegboard — best for hand tools you use weekly; cheap and fast to hang.
- Slatwall — best when you want a wide range of ready-made accessories and reconfigure often.
- French cleat — best for heavy or oddly shaped gear; highest load capacity per dollar.
- Overhead racks — best for seasonal boxes and rarely used gear; mount into joists, not drywall.
- Heavy-duty steel shelving — best for bulk items like paint cans and bottled water.
- Lockable cabinets — best for chemicals, sharp tools, and anything kids shouldn’t reach.
- Bike hooks or a pulley hoist — best for reclaiming floor space without hauling bikes up a ladder.
- Labeled clear bins — best for anything you need to identify without opening the lid.
- Painted parking boundaries — best for protecting your new storage from bumper dings.
Vertical Wall Storage: Pegboard, Slatwall, Rail, and French Cleat
Pegboard, slatwall, and French cleat solve the same problem in different ways, and picking the wrong one is the most common wall-storage mistake. Pegboard works best when it’s built from 1/4 inch hardboard or metal, not the thin quarter-inch stuff sold in big-box multi-packs, because thin boards flex and hooks pop loose under real weight. Slatwall costs more but supports a wider accessory ecosystem and higher per-hook capacity, which matters if you reconfigure your layout often. French cleat is the DIY sleeper pick: a wall built from plywood strips holds heavy, custom-shaped gear at a fraction of slatwall’s price.
Match the system to your gear, not your budget alone.
- Hand tools and small gear: pegboard with locking hooks.
- Mixed sporting equipment, frequent swaps: slatwall.
- Heavy or bulky items (generators, coolers): French cleat.
- Renters: pegboard or a freestanding cleat panel that skips wall anchors entirely.
Always screw into studs, not just drywall, and use masonry anchors on concrete block walls. Thin pegboard mounted with drywall anchors alone is the single most common failure point homeowners report.
Pro Tip: Upgrade to locking hooks before you upgrade the board itself. A $6 pack of locking clips does more to stop tools from vibrating loose than switching from pegboard to slatwall ever will.
Ceiling and Overhead Storage: Best Practices and Safety
Overhead racks are the single best way to add storage without losing floor space, and most homeowners underuse the ceiling entirely. A standard 4×8 platform typically holds between 250 and 600 pounds depending on the model, but that capacity only counts if you mount into ceiling joists, not drywall or drop-ceiling grid.
- Reserve overhead space for seasonal boxes: holiday decor, camping gear, off-season tires.
- Keep heavy, frequently used items at waist level. Nobody needs a torn rotator cuff retrieving a cooler.
- Label the bottom of each bin since that’s the only side you’ll see once it’s up there.
- Skip the stepladder shuffle for bikes and kayaks and use a ceiling pulley hoist instead.
Two 4×8 racks can free up a meaningful chunk of usable floor space in a typical two-car garage, which is often the difference between parking one car and parking two.
Shelving and Cabinets: Freestanding, Wall-Mounted, and Modular Systems
Steel shelving, plastic units, and lockable metal cabinets each solve a different storage problem, and mixing all three is usually the right call rather than picking just one. Steel shelving handles heavy, bulky loads like paint cans and bottled water without sagging. Plastic units cost less but flex under weight over time, so save them for lightweight items. Lockable metal cabinets exist for one reason: keeping chemicals, blades, and anything a curious kid shouldn’t touch behind a closed door.
- Put frequently used items on open shelves between waist and eye level for fast access.
- Reserve closed cabinets for hazardous materials, power tools, and anything with a safety concern.
- Budget roughly one linear foot of shelving per major category (paint, automotive, lawn and garden) as a starting point.
- If cabinets are out of budget, a repurposed filing cabinet or a secondhand kitchen cabinet does the same locking job for less.
Buy shelving units after you’ve zoned the space, not before. A shelf bought for the wrong zone just becomes another thing to move.
Tool, Workbench, and Small-Parts Organization
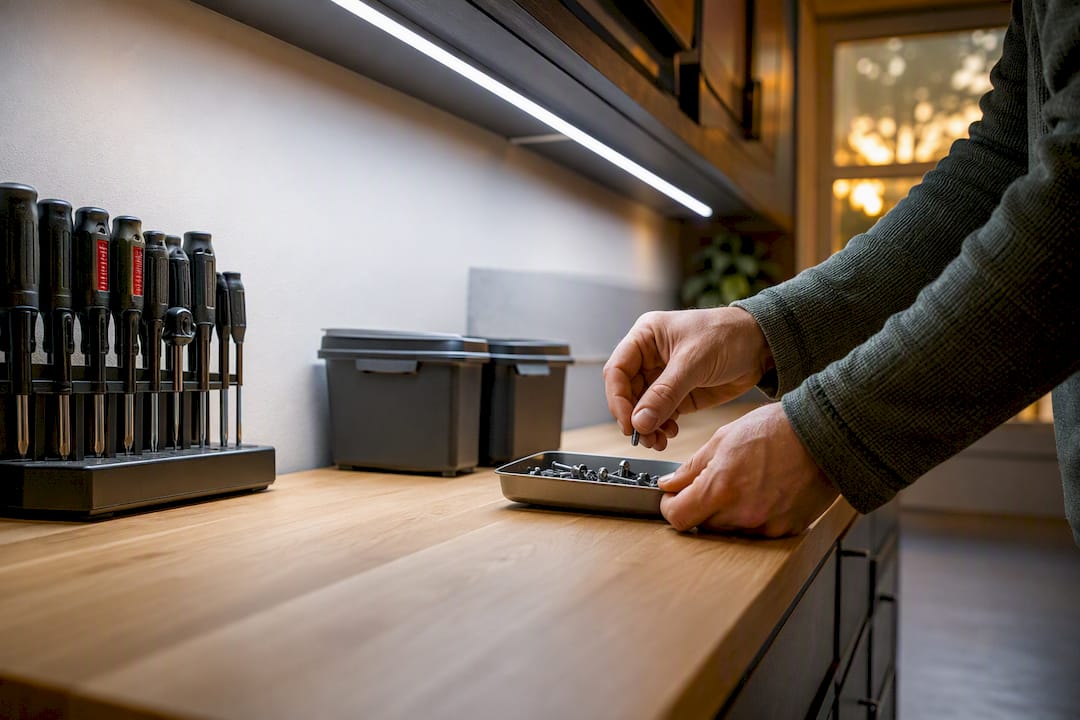
A workbench that actually gets used needs three things: enough light to see what you’re doing, a power outlet within reach, and a vertical panel behind it for the tools you grab most. Mount pegboard or a metal panel directly above the bench so wrenches and screwdrivers stay visible instead of buried in a drawer.
- Use drawer dividers to keep screws, bits, and fasteners from turning into a junk pile.
- Stick a magnetic strip along the front edge of the bench for quick-grab metal tools.
- Foam-cut socket organizers cut search time for the exact socket you need to seconds.
- Small clear bins beat one big catch-all bin for anything you sort by size or type.
Choose a rolling cart over a fixed cabinet if you move between the garage and driveway often. Fixed cabinets win when the bench stays in one spot and floor space is tight.
Pro Tip: Mount a strip light directly over the workbench rather than relying on the garage’s overhead fixture. Shadows from your own body are the number one reason people misplace small parts on a cluttered bench.
Bins, Labels, and Visibility Systems
Clear bins let you spot contents at a glance, but they fade and crack faster in direct sun near a garage door. Opaque bins last longer and hide clutter, at the cost of needing a label on every single one. Whichever you choose, stick to one uniform size per shelf so stacks stay stable and shelves don’t waste vertical space on mismatched heights.
- Label bin lids for floor and shelf storage; label bin bottoms for anything going overhead.
- Color-code labels by zone (yard tools green, automotive red, holiday blue) for a faster visual sort.
- Consistent labeling paired with a quick weekly check are one of the strongest predictors of a system staying organized past month one.
- Keep one open bin or shelf as a short-term drop zone for items you haven’t decided where to store yet. It keeps random clutter from re-spreading across the floor.
Parking, Vehicle Access, and Bulky-Item Storage
Bikes, ladders, and kayaks eat floor space fast, and they’re the items most likely to end up blocking a car door. Wall hooks or a ceiling pulley keep bikes up and out of the way; ladders do better on a rail rack up near the ceiling than leaned in a corner.
- Use floor tape or a rubber parking mat to mark exactly where the front bumper should stop.
- Leave at least two feet of walking clearance on each side of a parked car.
- Store heavy seasonal items (snow tires, deck furniture) on a low, easy-reach shelf instead of overhead.
How to Keep a Garage Organized: The Habit That Actually Works
The sequence matters more than the products: clear everything out, sort into keep and toss piles, define your zones, install the systems, then label everything.
- Clear out the entire garage, every box and item, onto the driveway.
- Sort ruthlessly into keep, donate, and trash.
- Zone the empty space by activity: tools, sports, automotive, seasonal.
- Install wall systems, overhead racks, and shelving inside each zone.
- Label every bin and maintain with a 10-minute weekly reset plus one annual purge.
Buying storage before zoning is the most common reason projects stall halfway through. Keep one shelf reserved as a short-term drop zone so new clutter has a home until you sort it properly.
Budget DIY Hacks and Quick Wins
A French cleat wall built from 3/4 inch plywood strips runs roughly $80 to $150 in materials and holds far more weight than most homeowners expect from a DIY build. Beyond that centerpiece, small repurposed projects add up fast.
- Mount broom and mop holders using spring clips screwed straight into a stud.
- Repurpose an old filing cabinet as a lockable spot for chemicals and sharp tools.
- Turn a coffee can into a rope or extension cord dispenser by threading the cord through a hole in the lid.
- Store nuts, bolts, and small hardware in labeled mason jars screwed lid-first into a shelf.
- Stack pallet wood into a simple rack for lumber or firewood.
Spend real money on load-bearing systems like wall cleats and overhead racks. Save on bins, labels, and small containers, where cheap options work just as well.
What Our Team Found Testing Garage Wall Systems
Thicker pegboard paired with locking hooks consistently outperformed thin, big-box pegboard in our garage setups. Overhead racks mounted into joists held seasonal loads without a hint of sag, while the same racks screwed only into drywall failed fast.
Our team at Lizard’s Lunch tested several combinations of wall systems and overhead storage across different garage layouts, and the pattern held every time: cheap materials fail under real-world weight, while a modest upgrade in board thickness and hardware quality pays off for years. For more on the decluttering side of this project, our guide on decluttering your home fast covers the sorting step in more detail, and our piece on decluttering a closet without the mess applies the same keep-or-toss logic to garage shelving. Local pricing and product availability will vary by region, so treat brand and cost specifics as a starting point rather than a guarantee.
Realistic Expectations for Your Garage Project
A weekend gets you decluttered and zoned with pegboard or a cleat wall up. A full overhead system, cabinets, and a finished workbench realistically takes several weekends spread over a month. Spend your first dollars on wall and overhead systems since those are the load-bearing pieces that are painful to redo later; bins and labels can wait and cost little regardless of when you buy them. Start with zoning, not shopping, and the rest of the project gets noticeably easier. If a full room-by-room decluttering approach appeals to you, a guide on organizing kitchen cabinets fast uses the same sorting logic that works in a garage.
— Alexander
If you’re rethinking storage room by room rather than just the garage, a guide on what a healthy lifestyle actually looks like covers how a decluttered home supports habits that stick, from meal prep space to a workout corner. For readers drawn to smaller-footprint gear storage, this guide to organizing baby gear without the chaos offers a useful parallel for bins and visibility systems on a smaller scale.
Sources
- Garage Storage and Organization — Garage Storage Guide
- Workshop wall storage: Pegboard vs Slatwall vs French Cleat (The Tool Scout)
- The Complete Garage Organization Guide 2026: Zones, Systems, and Step-by-Step Plans | The Garage Guide
- Slatwall vs pegboard (comparison and load tests)
- 55 Easy Garage Storage Ideas for Instant Organization — HGTV

















Leave a Comment
Your email address will not be published. Required fields are marked with *