
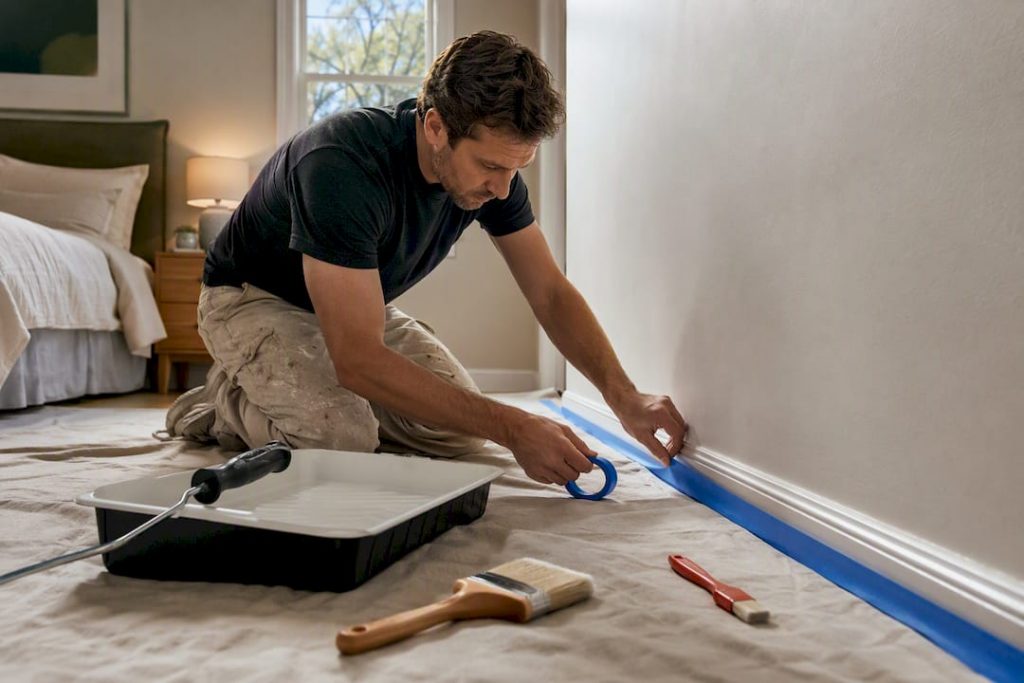
Decide whether to DIY or hire for interior painting. Follow trade-tested, prep-first steps to finish one room in a weekend and use the included hiring…
For a single room or two with normal wall height, a homeowner who commits to real prep can get a professional-looking finish over a weekend. For whole-house repaints, ceilings above nine feet, textured plaster, or homes built before 1978 where lead paint is a concern, hire a pro instead. Use the checklist below to scope your job, then jump to the hiring section if your project fits that second category.
TL;DR:
- Proper preparation accounts for most of the painting time and significantly impacts the final professional look.
- A full-day is usually sufficient for painting a standard 12×12 room, including prep, coats, and touch-ups, with drying times considered.
- Use high-quality, zero- or low-VOC latex paint for durability and safety, especially in sensitive rooms like bedrooms and nurseries.
- Hiring a professional becomes necessary for whole-house projects, ceilings over nine feet, textured surfaces, or homes built before 1978 with lead paint concerns.
- Critical steps to ensure quality include tinting primer to match the topcoat, sand between coats, and testing colors under actual room lighting.
Table of Contents
- Quick-Start Checklist for Interior Painting
- How Do You Actually Paint a Room the Right Way?
- How Do You Choose the Right Paint and Sheen?
- What Tools Do You Actually Need?
- How Long Does an Interior Painting Project Take, and What Does It Cost?
- How Do You Choose and Vet a Professional Painter?
- Cleanup, Curing, and Touch-Ups
- Fixing Common Painting Mistakes
- How Does Color Psychology Affect Your Room Choices?
- What Are the Best Low-Toxicity Paint Options?
- How Do You Create Special Paint Finishes?
- Painting Checklist
- Where to Learn More
- Sources
Quick-Start Checklist for Interior Painting
Before you crack open a paint can, get your supplies and sequence locked in. The order matters as much as the materials: skipping prep to “just get color on the wall” is the single most common reason a paint job looks amateur.
Supplies to gather:
- Angled sash brush (2½ inch), synthetic roller covers, and an extension pole
- Drop cloths (canvas, not plastic, for grip), painter’s tape, and a 5-in-1 tool
- Spackle or joint compound, sandpaper (120 and 220 grit), and a HEPA vacuum
- Primer, your chosen paint, stir sticks, and a paint tray with liners
Sequence: clear and protect the room, repair and sand surfaces, prime if needed, cut in edges, roll walls, apply a second coat, finish trim, then clean up.
For a standard 12×12 room, budget ample time for prep, each coat, drying between coats, and trim and touch-ups. A full day generally suffices to complete most bedrooms and home offices start to finish.
How Do You Actually Paint a Room the Right Way?
Getting a clean result comes down to sequence and patience more than brand loyalty or brush count. Here’s the order trade pros actually follow, and why each step exists.
- Clear and protect the space. Move furniture to the center of the room or out entirely, remove switch plates and outlet covers, and pull hardware off doors when possible. Label screws in a small cup or bag so you’re not hunting for them later. Lay drop cloths and tape floor edges before you touch a single tool.
- Repair and sand. Fill small nail holes and hairline cracks with spackle; use joint compound for larger gouges or drywall seams since it sands smoother and shrinks less. Trade guidance from This Old House recommends 120 grit for smoothing wall imperfections and 220 grit for scuffing trim so new paint has something to grip. If your home predates the mid 1970s, test for lead before you sand anything, since disturbing old paint dust is a real hazard.
- Clean up the dust. Run a HEPA vacuum over sanded areas, then wipe down with a damp tack cloth. Skipping this step is how you end up with a gritty texture trapped under your topcoat.
- Prime when it counts. New drywall, stained surfaces, or a jump from a dark color to a pale one all call for primer. Behr’s guidance suggests tinting primer to roughly 80% of your topcoat shade when covering a dramatic color change, which cuts down on the number of finish coats you need.
- Cut in first. Load your angled brush about a third of the way up the bristles, and work corners, ceiling lines, and trim edges in smooth, overlapping strokes before you ever pick up a roller.
- Roll in a “W” pattern. Load the roller, apply it in a loose W shape across a three-foot section, then fill in without lifting the roller, working from dry paint into wet to avoid lap marks. Avoid going back over paint that’s started to tack up.
- Apply a second coat. Benjamin Moore’s process guide notes most interior latex paints need one to two hours between coats, with a full second coat typically required for even coverage and true color depth.
- Finish trim last, in this order: ceiling, then walls, then trim and baseboards. Painting trim last means any drips or splatter that lands on the baseboard gets covered by the trim coat, not the reverse.
Pro Tip: Paint doors and shutters while they’re flat on sawhorses instead of hanging vertically. Gravity pulls drips down a vertical surface fast, and a flat orientation gives you a smoother, brush-mark-free finish on high-visibility pieces.
How Do You Choose the Right Paint and Sheen?
Paint quality is not a place to cut corners, and the math backs that up. Higher-grade paints carry more pigment and better resin binders, which means fewer coats, better washability, and a finish that holds up under sunlight and scrubbing. A cheaper paint that needs three coats to look even isn’t actually saving you money once you count your time and materials.
Sheen should match how a room gets used, not just how it looks in the can:
- Flat or matte for ceilings and low-traffic bedrooms, where a soft finish hides minor wall imperfections.
- Eggshell for living rooms and dining rooms, balancing a bit of sheen with easy touch-ups.
- Satin or semi-gloss for kitchens and bathrooms, since This Old House points to those finishes as far easier to wipe down and more moisture-resistant.
- Semi-gloss for trim and doors, where durability and a crisp look matter most.
Check the label for VOC content if anyone in the household has respiratory sensitivities. Low- and zero-VOC formulas are now standard at most major paint counters and perform just as well as older, higher-emission versions. Crack a window and run a fan regardless of which paint you choose. Skip a separate primer only when you’re covering a similar color on a sound, previously painted surface. Anything else, prime first.
What Tools Do You Actually Need?
A short, correct tool list beats a cart full of gadgets you’ll use once. Stick with synthetic bristle brushes for latex paint (natural bristles are for oil-based only), and keep a 2½ inch angled sash brush on hand for cutting in.
- Roller covers: 3/8 inch nap for smooth walls, 1/2 inch for lightly textured surfaces, and 3/4 inch or higher for heavy texture or stucco-style walls.
- Sanding: 120 grit for wall smoothing, 220 grit for trim, paired with a HEPA vacuum for cleanup, especially on older paint.
- Masking: use painter’s tape in short, manageable strips and burnish the edge with a putty knife to stop bleed-through, a trick pros lean on more than long unbroken tape runs.
- Sprayers: rent an HVLP or airless sprayer only for large cabinet runs or whole-room jobs where brush and roller time would eat your whole weekend; otherwise skip it.
How Long Does an Interior Painting Project Take, and What Does It Cost?
A single 12×12 room typically runs one full day when you count prep, two coats, and trim work, though the paint is dry-to-touch within a few hours and fully cured only after 24 or more hours. Don’t push furniture back against a freshly painted wall before that window closes.
Several factors swing your budget more than square footage alone:
- Amount of prep and repair work needed (patching, sanding, wall condition)
- Paint quality and number of coats required
- Ceiling height, trim detail, and the number of colors involved
- Local labor rates if you’re pricing out a hired job
There’s no single flat rate for interior painting, which is exactly why generic per-square-foot numbers online rarely match real quotes. Get project-specific estimates instead of trusting an average.
Prep isn’t a small slice of the job, it’s most of it. Trade sources consistently point to preparation and surface repair eating up a disproportionate share of total project time compared with actual paint application, which is exactly why rushing that stage is the fastest way to a bad result.
If you’re weighing this project against other upgrades on your list, our home improvement tips for maximizing ROI breaks down where painting ranks against other renovations.
How Do You Choose and Vet a Professional Painter?
Whole-house jobs, vaulted ceilings, or specialty finishes are where hiring stops being optional and starts being the smart move. A poor contractor choice costs more than a bad DIY weekend, so vet carefully.
- Confirm insurance and licensing. Ask for proof of liability coverage and workers’ compensation before anyone sets foot on a ladder in your home.
- Request three recent references and actually call them, asking specifically about cleanup, timeline accuracy, and whether the crew showed up when promised.
- Ask what’s included in the quote. Does it cover full prep, patching, priming, and two coats, or is that all billed separately?
- Get the paint brand and sheen in writing. A vague “quality paint” line in a contract is a red flag.
- Ask about timeline and daily cleanup. Will they protect floors and furniture every single day, or just at the start and end of the job?
- Compare bids apples-to-apples. Line up scope, paint brand, number of coats, and prep work side by side. The lowest number is often the lowest because it’s cutting one of those corners.
- Watch for red flags: no written contract, demands for full payment upfront, or a bid dramatically lower than every other quote you received.
If you’re searching “professional painters near me” and getting a wall of options, treat this checklist as your filter before you ever pick up the phone; alternatively, explore what is digitally printed wallpaper as a complete guide to understand specialty finishes and surface options digitally printed wallpaper: a complete guide.
Cleanup, Curing, and Touch-Ups
Pull painter’s tape when the paint is dry to the touch but not fully cured, usually within a few hours, and pull it at a slow 45 degree angle to avoid tearing the fresh edge.
- Clean latex-paint brushes and rollers with warm water and mild soap; oil-based paint needs mineral spirits instead.
- Store leftover paint in a sealed can, label it with the room, brand, and color code, and keep it somewhere that won’t freeze.
- Treat “dry” and “cured” as different milestones. Most interior latex is dry to the touch in a few hours but needs 24 or more hours before you rehang art or push furniture back against the wall.
- Wait a full week or more before scrubbing a newly painted wall, since the finish keeps hardening well past the point where it looks finished.
Fixing Common Painting Mistakes
Drips and runs are easiest to fix while still wet: smooth them out with a dry brush before they set. Once cured, lightly sand the drip flat, spot-prime, and feather in a fresh coat with a brush rather than a roller to blend the edge.
Lap marks and roller stipple usually mean the paint dried before the next pass overlapped it. Fix them with a light 220-grit sanding pass and a full recoat, rolling in one consistent direction across the whole wall rather than working in small patches.
Peeling almost always points to a prep failure, usually moisture, dirt, or grease trapped under the old coat. Scrape back to sound material, clean thoroughly, prime, and repaint. If peeling covers a large area or keeps recurring, that’s your signal to call a professional and check for an underlying moisture problem.
How Does Color Psychology Affect Your Room Choices?
Color changes how a room feels before it changes how it looks. Warm tones like soft terracotta or golden yellow tend to energize a kitchen or dining area, while cool blues and greens read as calming, which is part of why they show up so often in bedrooms and bathrooms.
Light plays a bigger role than most people expect. Color testing under real room lighting matters because north-facing rooms pull cooler and can make a warm beige look gray, while south-facing rooms flood a space with warm light that can wash out pale colors entirely. Paint a two-foot swatch directly on the wall and watch it at morning, midday, and evening before committing to a full room.
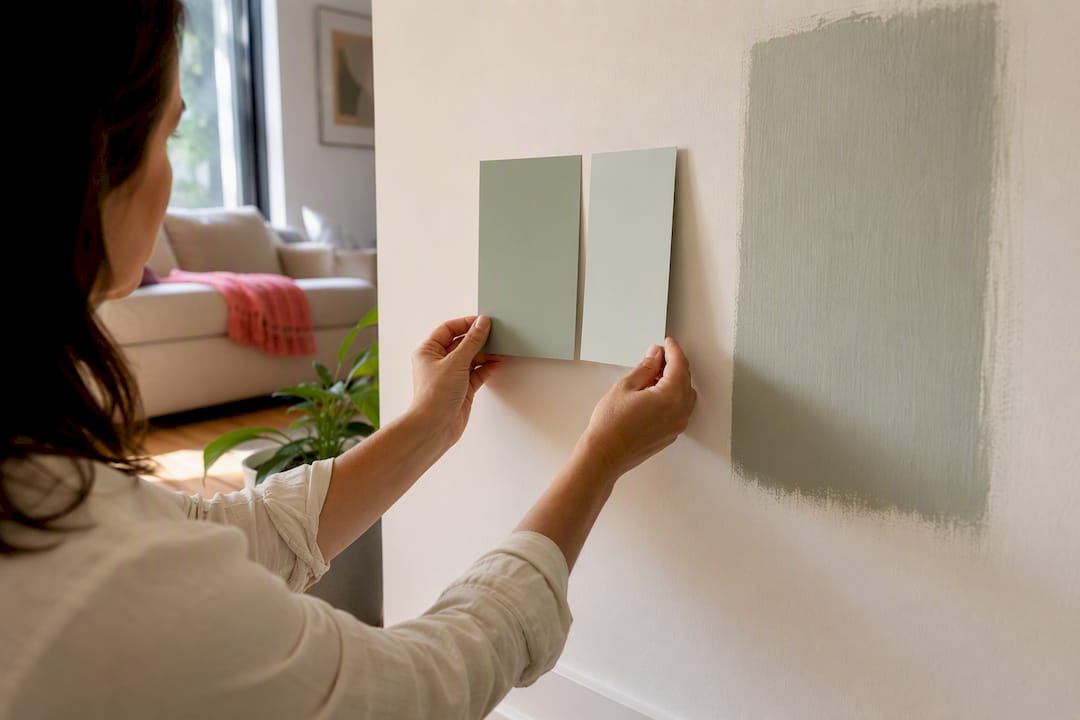
Fixed elements in the room, meaning your flooring, cabinets, and countertops, narrow your palette more than any trend chart. A color that looks perfect on a paint chip can clash badly with warm oak floors or cool gray tile once it’s actually on the wall.
Small rooms benefit from lighter, low-contrast colors that keep sightlines open, an idea covered in more depth in our guide on making a small bedroom feel bigger. Bathrooms and powder rooms have their own rules entirely, where humidity and mirror lighting change how a shade reads; our breakdown of paint colors that work in bathrooms covers that in detail. If you’re rethinking a living room’s mood alongside its color, lighting fixtures shift the whole equation too, which our living room lighting guide walks through.
What Are the Best Low-Toxicity Paint Options?
Zero-VOC and low-VOC paints are no longer a niche upgrade. Most major manufacturers now carry a zero-VOC line that performs on par with standard formulas in coverage, durability, and cleanability, so you’re rarely trading performance for a healthier finish.
VOCs, or volatile organic compounds, are the chemicals responsible for that sharp paint smell and the headaches some people get from fresh paint fumes. They off-gas most heavily in the first 48 to 72 hours after application, which is exactly why ventilation matters even with a “low-odor” label on the can.
A few practical guidelines make a real difference:
- Choose zero-VOC or low-VOC formulas for nurseries, bedrooms, and any room with limited airflow.
- Keep windows open and a fan running during application and for at least a day afterward, regardless of the VOC rating.
- Watch for paints labeled with third-party low-emission certifications rather than just marketing claims of “eco-friendly.”
- If you’re sensitive to fumes, paint one room at a time and stay out of the space during the first day of curing.
Milk paints and clay-based paints exist as ultra-low-chemical alternatives, though they come with tradeoffs in durability and color range that make them better suited to accent walls or furniture than whole-room repaints. For most homeowners, a quality zero-VOC latex from a mainstream manufacturer hits the right balance of safety, performance, and cost.
How Do You Create Special Paint Finishes?
Textured walls, glazing, and sponging all trade some of the simplicity of a flat color for a more layered, dimensional look, and each one has its own technique.
Textured walls need a different approach to rolling. Use a thicker nap roller cover (3/4 inch or higher) to push paint into the texture fully, and expect to use noticeably more paint than you would on a smooth wall since the surface area is effectively larger. Back-rolling, meaning a second light pass right after the first, helps avoid the pale, uneven spots that show up when texture peaks don’t get fully coated.
Glazing involves mixing a translucent glaze medium with paint, then applying it over a base coat and manipulating it with a brush, rag, or specialty tool before it sets. It creates depth and subtle color variation that flat paint can’t match, but it dries fast, so work in small sections and have your rag or brush ready before you start.
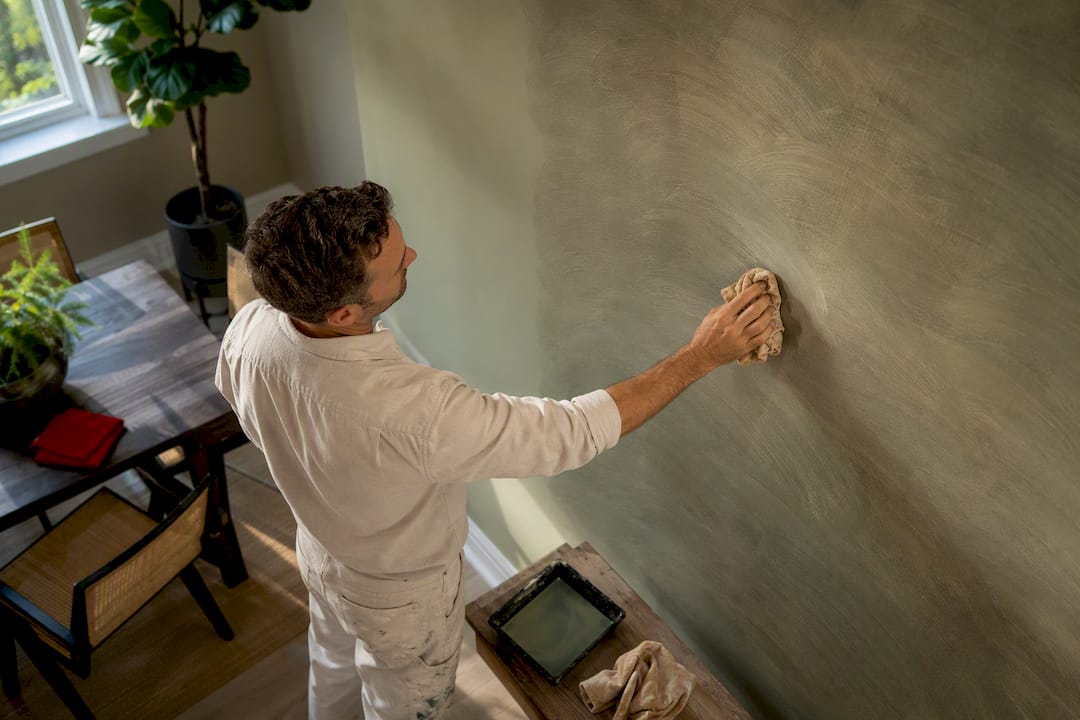
Sponging uses a natural sea sponge dabbed in a second color over a dry base coat, applied in a random, overlapping pattern to avoid an obvious repeat. Practice on cardboard first. The technique looks easy but a heavy hand with the sponge creates blotchy patches instead of the soft, mottled effect you’re after.
All three finishes reward patience over speed, and all three are far less forgiving of mistakes than a flat color, which is where a lot of ambitious DIYers get in over their heads on a feature wall.
Painting Checklist
Prep still does most of the heavy lifting, full stop. Beyond that, five moves consistently separate an amateur result from a professional one: tinting your primer toward the topcoat color, painting doors flat instead of vertical, burnishing tape edges instead of trusting the tape alone, sanding between coats on trim, and always doing a real on-wall color test before buying five gallons.
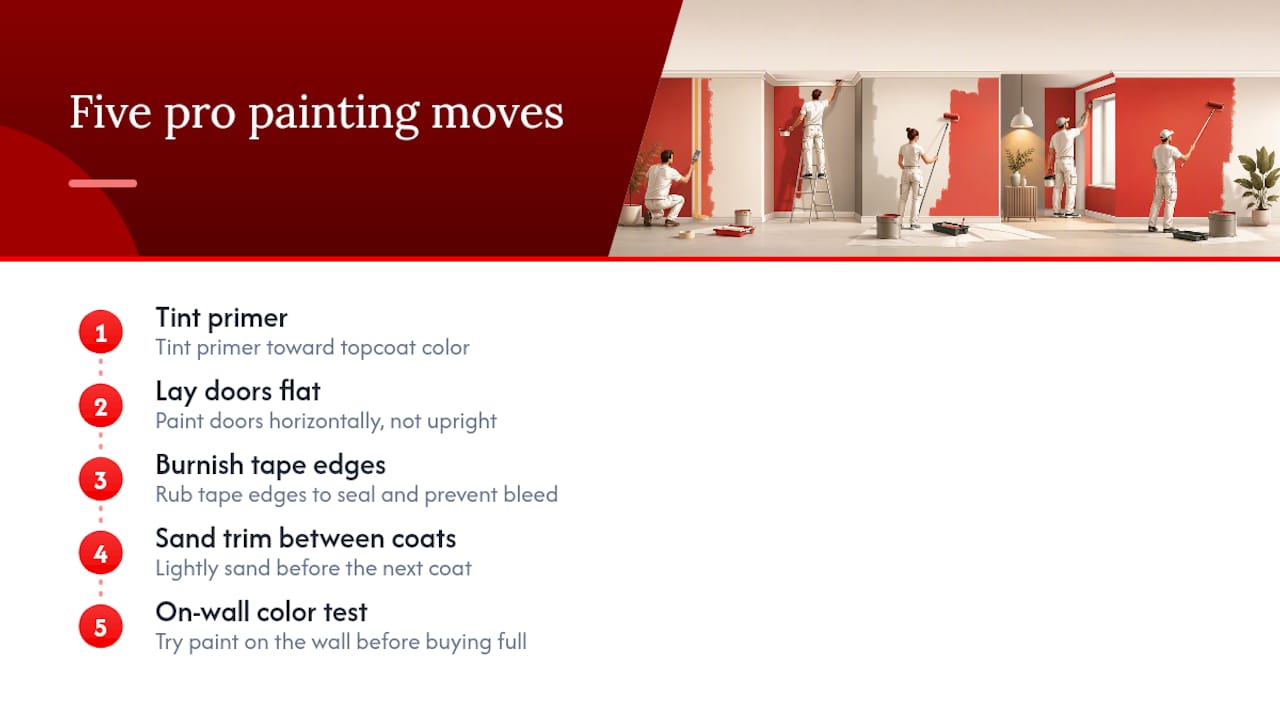
A better brush and a gallon of quality paint are the cheapest professional-grade upgrades you can make. As a rubric: DIY when you have a weekend, one or two rooms, and patience for prep. Hire out anything involving vaulted ceilings, whole-house scope, or suspected lead paint.
For readers planning a bigger renovation around this project, our step-by-step home renovation guide and our roundup of renovation ideas that add character are worth a look before you finalize your scope.
— Alexander
Where to Learn More
For manufacturer-backed technique, check Benjamin Moore’s room-painting guide and Behr’s primer and tinting advice. For prep standards and grit guidance, see This Old House’s interior painting tips and Prep Paint Tools’ project planning guide. For color inspiration in specific rooms, revisit our bathroom paint color guide.


















Leave a Comment
Your email address will not be published. Required fields are marked with *